What You’ll Need
Before you start:- Airtable account for Mary - Create a separate Airtable account that Mary will use to access your bases
- allGood account - Access to Settings → Integrations
- Airtable base - The base where you’ll assign work to Mary
What This Integration Does
This integration allows you to assign work to Mary directly from Airtable:- You configure which Airtable tables Mary should monitor
- When you assign a record to Mary in Airtable, she automatically receives it
- Mary can read the record details, add comments, and access attachments
- You can track Mary’s progress by watching for her updates in Airtable
IT Coordination Guide
Security & Account Setup Requirements
- Create a dedicated Airtable user account for Mary with appropriate permissions
- Use a monitored email address for the service account (not personal email)
- Webhook configuration required for task collaboration notifications
- Store credentials securely according to company policy
Step-by-Step Setup
Connect Mary's Airtable Account
- Log into allGood with your own account
- Go to Settings → Integrations
- Under Advanced, click on Airtable
- Click Link your Airtable account
- Select the base(s) you want Mary to access (you can select multiple bases)
- Click Grant access
Configure Your Table for Mary
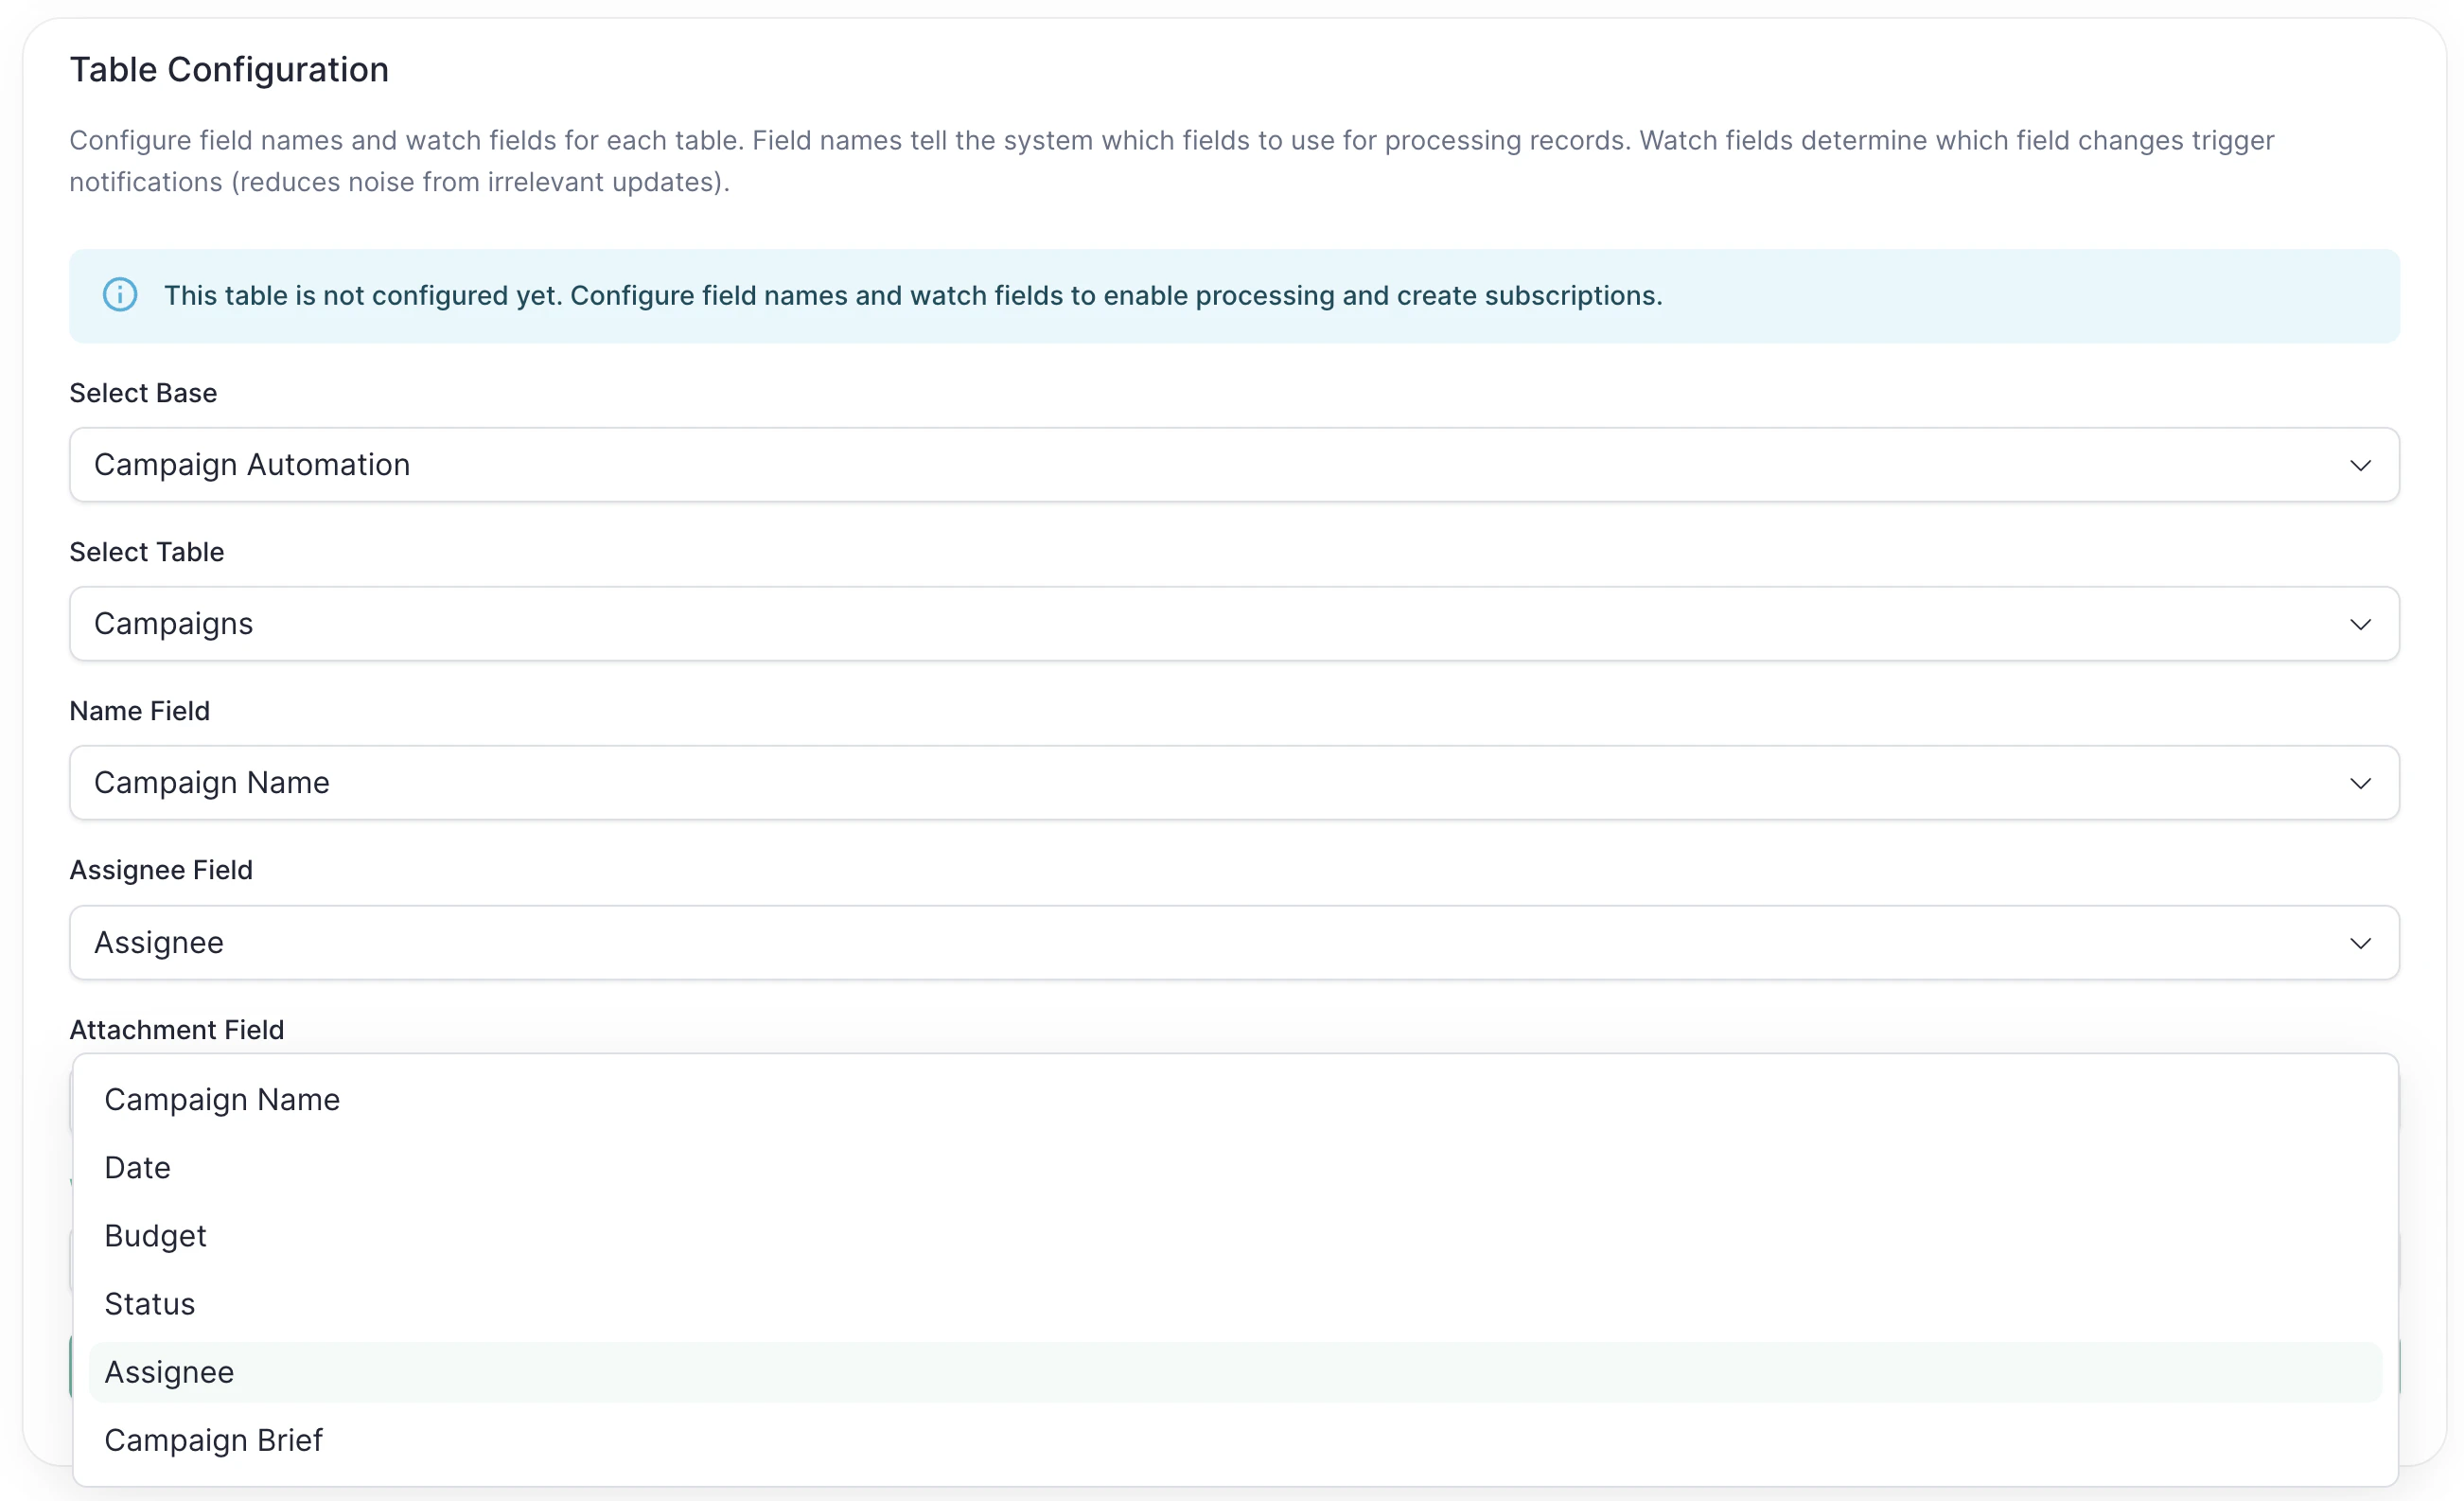
- In the Table Configuration section, select your Base
- Select the Table where you’ll assign work to Mary
-
Map these three fields (tell Mary where to find key information):
- Name Field: Which field has the record’s name? (like “Task Name”)
- Assignee Field: Which field shows who’s assigned? (like “Assigned To”)
- Attachment Field: Which field has file attachments? (like “Attachments”)
-
Select Watch Fields: Choose which field changes Mary should notice
We recommend selecting only the Assignee field. This ensures Mary gets notified when work is assigned to her, but not for every other change to the record.
- ✅ Mary gets notified when someone assigns the record
- ❌ Mary ignores description changes
- ❌ Mary ignores date changes
- Click Save Table Configuration
Create a Subscription
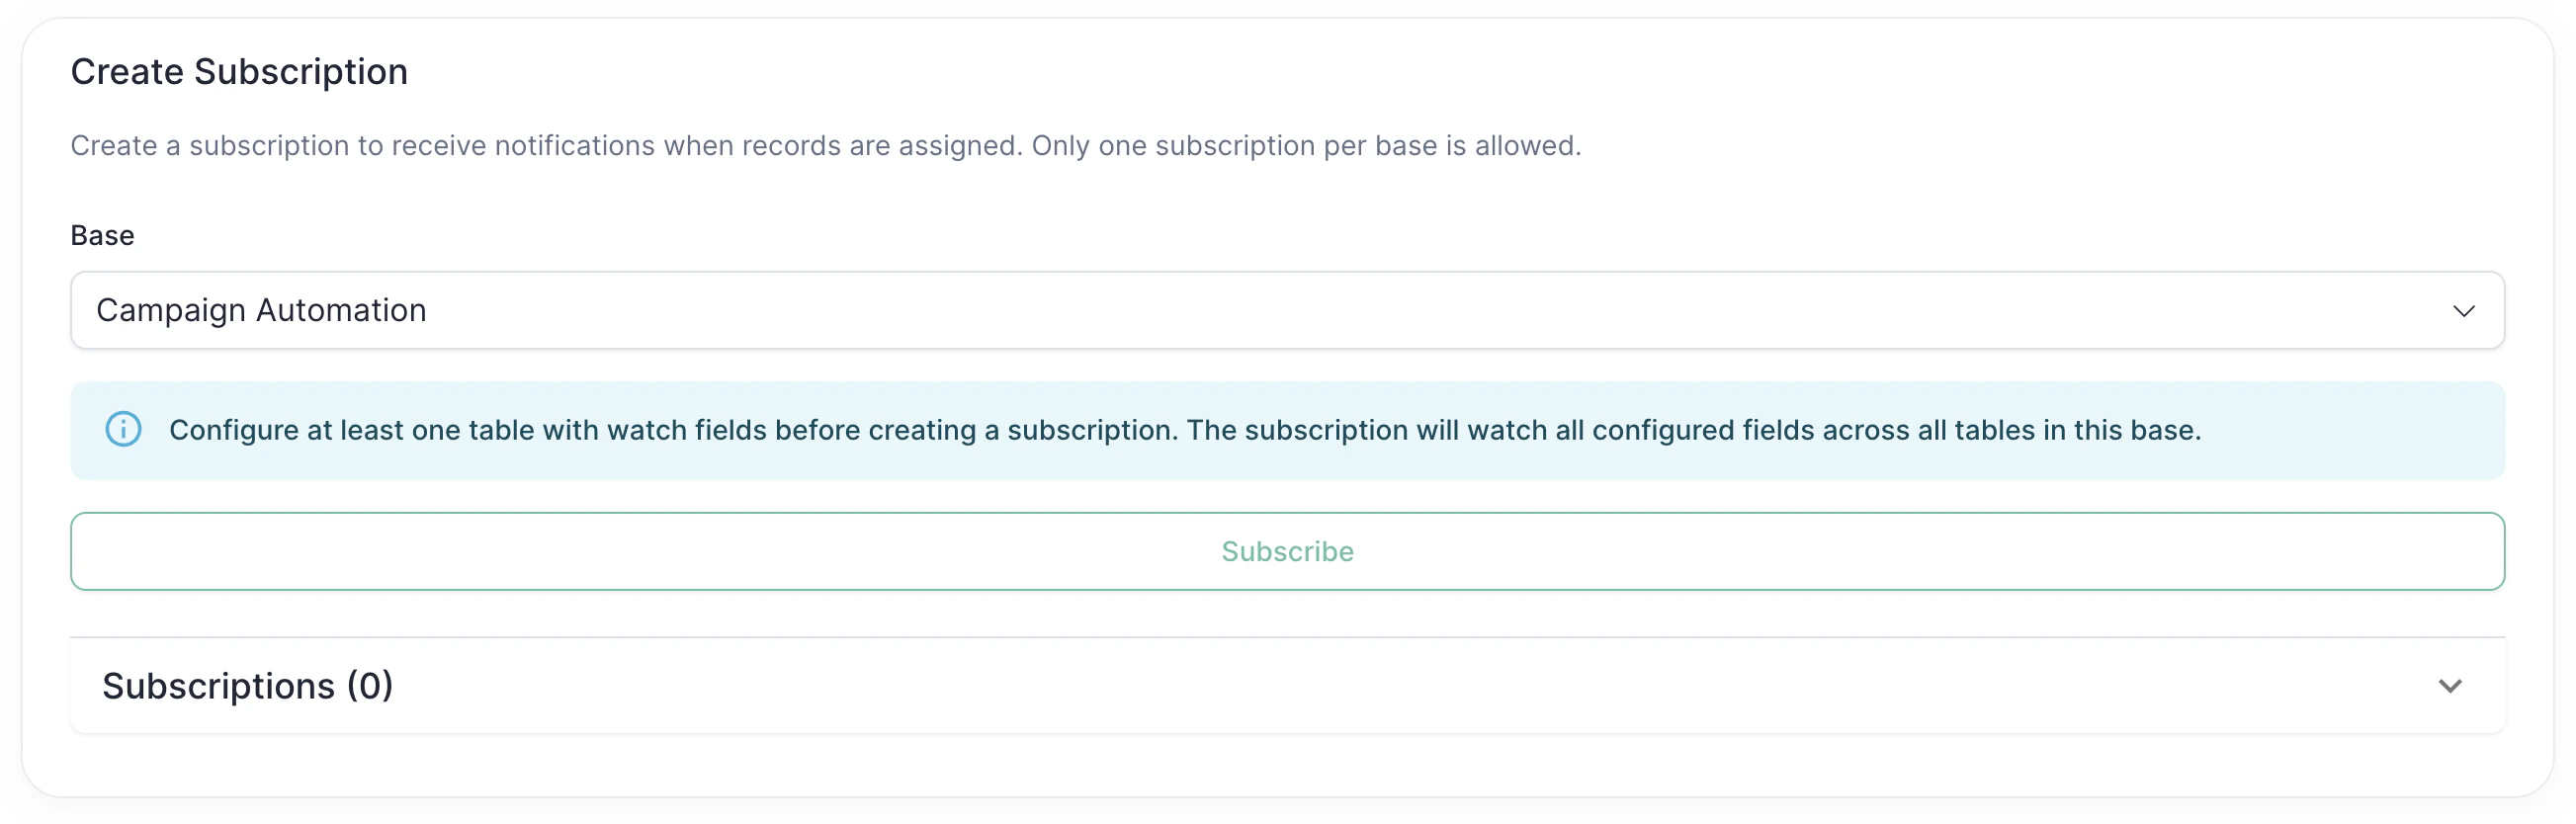
- Select your Base (same one as Step 2)
- Click Subscribe
Test It Out
- Open your Airtable base
- Upload a file to a record’s attachment field (docx, csv, or excel file)
- Assign the record to Mary (set the assignee field to Mary)
- Mary will receive the assignment and start working on it
Advanced Configuration
Monitoring More Tables
To add another table in the same base:- Go to Table Configuration
- Select the same base, different table
- Configure the fields and watch fields
- Click Save
- Scroll to Create Subscription
- Click on your subscription to expand it
- Click Recreate Subscription
Changing Watch Fields
If you want to change watch fields for a table you already configured:- Update the watch fields in Table Configuration
- Click Save
- Scroll to Create Subscription
- Click on your subscription to expand it
- Click Recreate Subscription
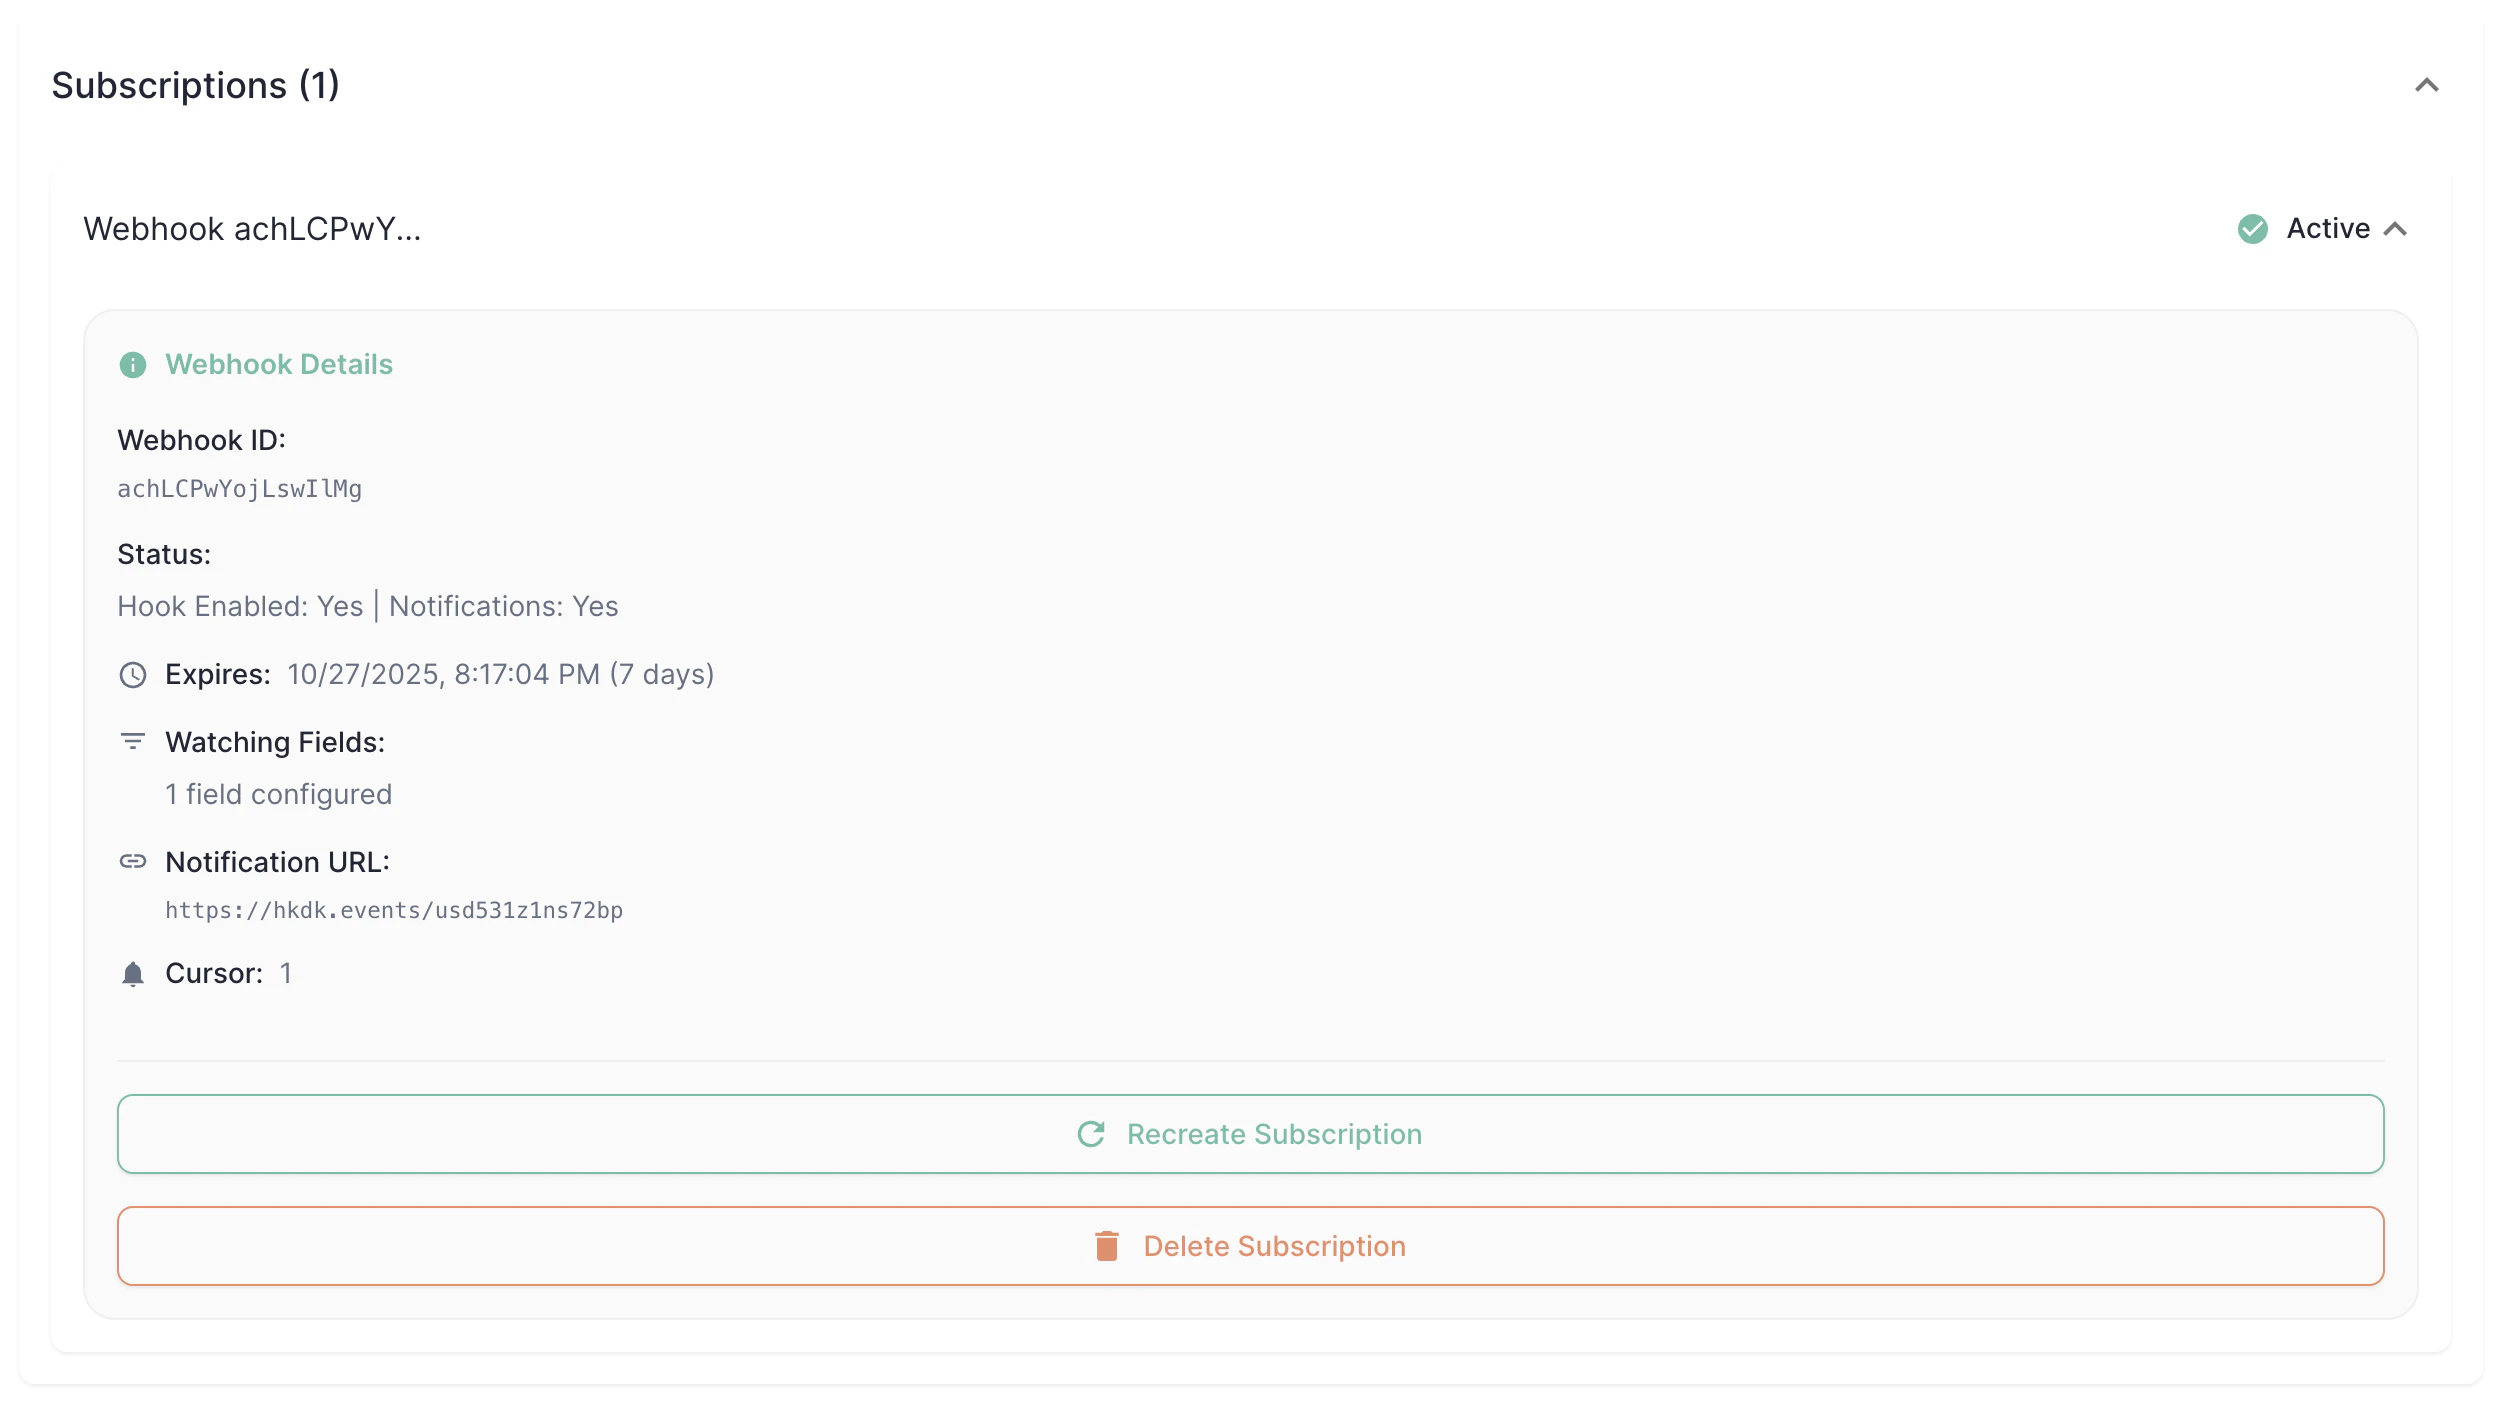
Subscription Status
Click on a subscription to see:- ✅ Green “Active” = working
- ⏰ Yellow “Expiring soon” = will auto-refresh
- ❌ Red “Expired” = click Recreate
Frequently Asked Questions
What does this integration do?
What does this integration do?
What can Mary access in my Airtable?
What can Mary access in my Airtable?
- Read records from tables you configure
- Add comments to records when she completes work
- Read file attachments from records
- Tables you don’t configure for her
- Bases you don’t set up
Why do I need to configure watch fields before creating a subscription?
Why do I need to configure watch fields before creating a subscription?
Can I have multiple subscriptions in one base?
Can I have multiple subscriptions in one base?
How do I add more tables to monitor?
How do I add more tables to monitor?
- Go to Table Configuration
- Select your base and a new table
- Configure the field mappings and watch fields
- Save the configuration
- Go to Create Subscription section
- Expand your subscription and click “Recreate Subscription”
What happens if I change watch fields or add new tables?
What happens if I change watch fields or add new tables?
- Update the watch fields or add new tables in Table Configuration
- Save the changes
- Go to Create Subscription section
- Expand your subscription and click “Recreate Subscription”
What are the required field mappings?
What are the required field mappings?
- Name Field: Identifies the record (e.g., “Task Name”)
- Assignee Field: Shows who’s assigned
- Attachment Field: Contains file attachments
Can different tables have different field names?
Can different tables have different field names?
How long do subscriptions last?
How long do subscriptions last?
Which changes trigger notifications?
Which changes trigger notifications?
Do comments trigger notifications?
Do comments trigger notifications?
What's the notification delay?
What's the notification delay?
What if the wrong Airtable account gets linked?
What if the wrong Airtable account gets linked?
- In the browser window you’ll use for reconnection, go to airtable.com and confirm you’re signed into Mary’s Airtable account — sign out and back in if needed
- In allGood, go to Settings → Integrations → Airtable
- Click Reconnect Airtable account and complete the authorization
- Verify the connected email matches Mary’s Airtable account
Troubleshooting
Mary isn't receiving assignments
Mary isn't receiving assignments
- ✅ Is the subscription status “Active”?
- ✅ Did you change the Assignee field (the one you configured as the watch field)?
- ✅ Is the Assignee field mapped correctly in Table Configuration?
"No watch fields configured" error when creating a subscription
"No watch fields configured" error when creating a subscription
- Go to Table Configuration
- Select a base and table
- Configure field names
- Select at least one watch field
- Click Save Table Configuration
- Try creating the subscription again
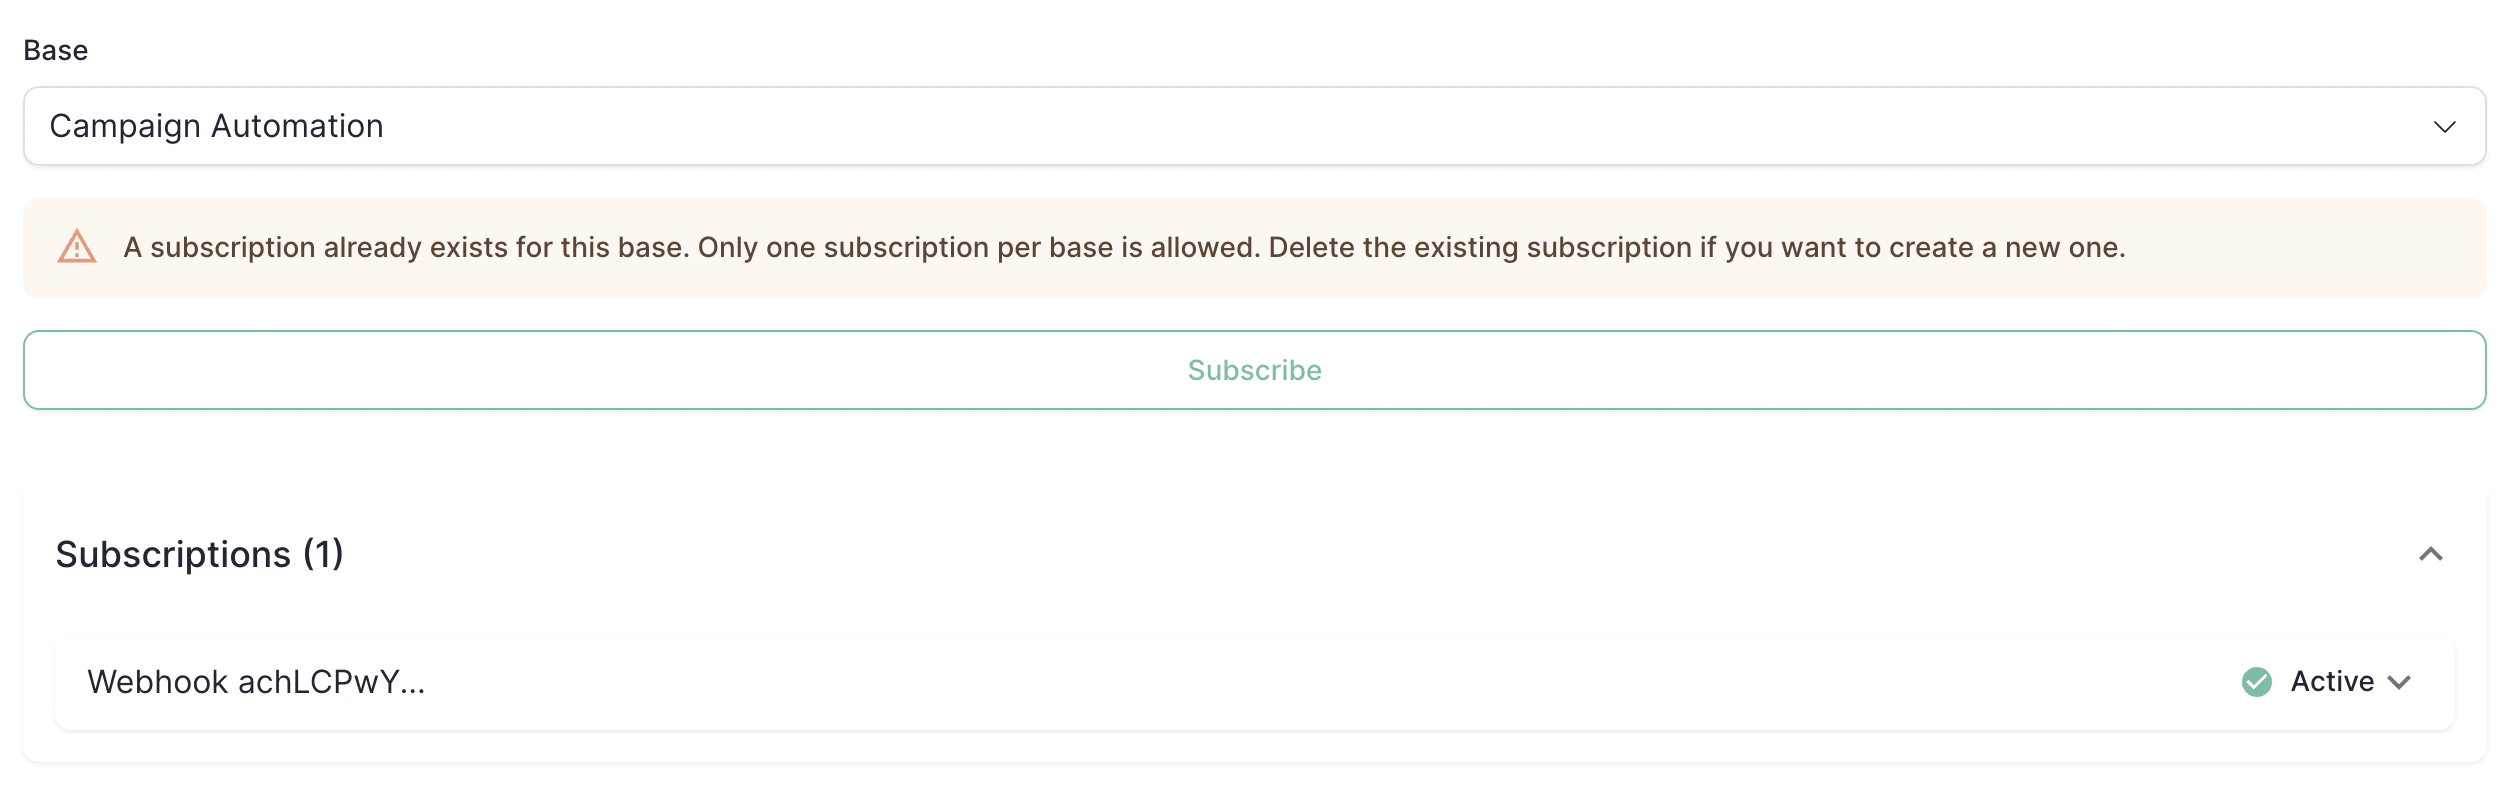
"A subscription already exists for this base"
"A subscription already exists for this base"
- Use the existing subscription and configure more tables under it
- Delete the existing subscription and create a new one
- Recreate the existing subscription to update it
The OAuth connection shows "Disconnected"
The OAuth connection shows "Disconnected"
- Click “Reconnect Airtable account”
- Complete the OAuth flow again
- Your configurations will be restored
Webhook keeps expiring despite auto-refresh
Webhook keeps expiring despite auto-refresh
- Manually recreate the subscription
- If problem persists, reconnect your Airtable account
- Contact support if issues continue
Subscription status reference
Subscription status reference
- Green “Active”: Working correctly
- Yellow “Expiring in X days”: Will be auto-refreshed soon
- Red “Expired”: Needs manual recreation — click Recreate Subscription
Still need help?
Still need help?