A Marketo smart campaign you’d like to trigger the webhook from
This can be an existing campaign, or you can create a new one for this purpose.
A webhook template payload
This payload determines the data that Marketo sends to allGood in the webhook. Reach out to allGood support to get the right template payload for your use-case, or use the default one provided in the steps below.
An allGood Webhook URL
This will look like https://webhook.allgoodhq.app/xxxxxxxxxxxxxx. You can get this URL from allGood support, or by creating an Item Webhook in the worksheet you’d like to connect to.
Creating a webhook URL (if you don't have one already)
First, you’ll need to create an allGood worksheet with your desired automation steps. Then, in the worksheet settings, create an Item Webhook.
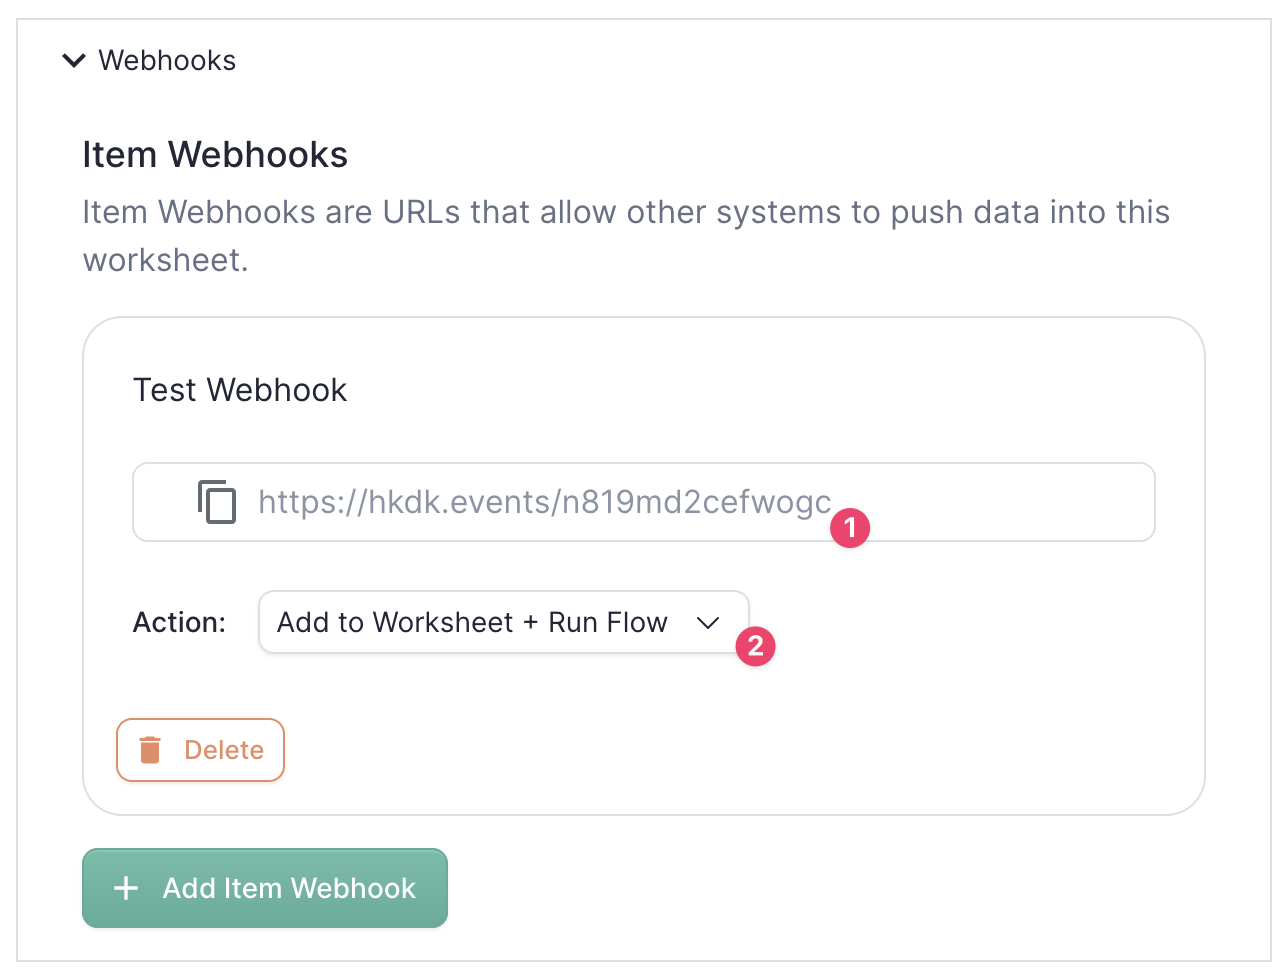
Item Webhook settings in an allGood worksheet
1
Copy the webhook URL
Write down this URL—this is the webhook URL that’ll need to go to Marketo.
2
Set the Action
Make sure the Action is set to Add to Worksheet + Run Flow if you’d like the flow to automatically execute when new items come in.
Make sure you have all of these prerequisites in place before moving on. If you have any questions, reach out to allGood support and we can help walk you through the process.
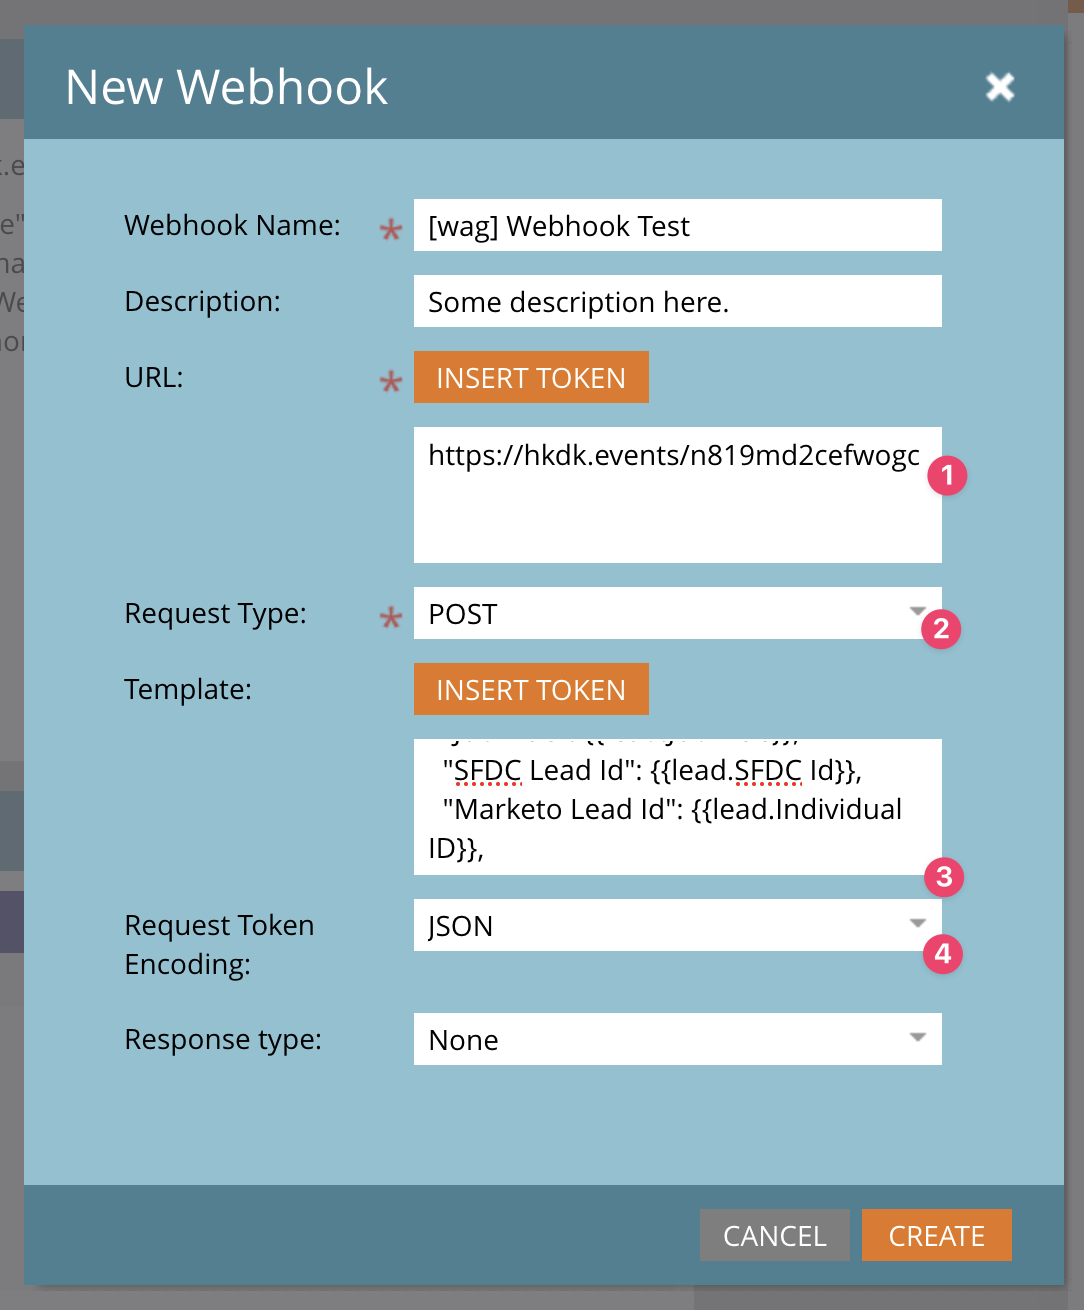
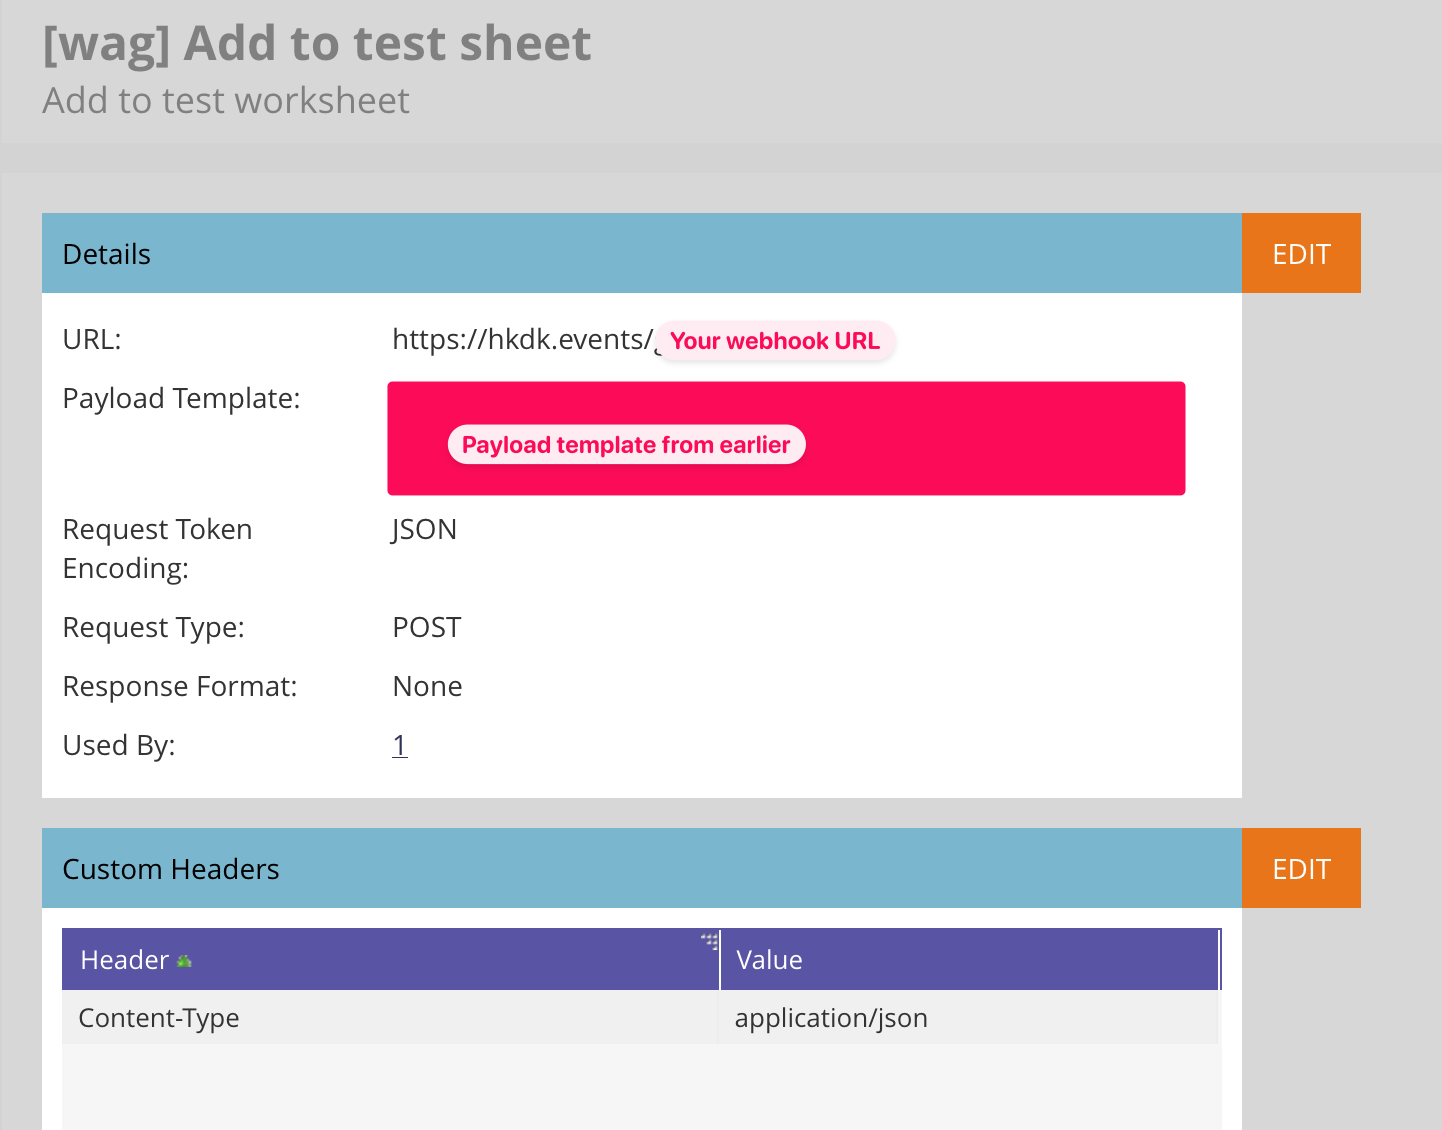
Set the URL
Under URL, enter the webhook URL from earlier.
Set the Request Type
Under Request Type, select POST.
Set the Template
Under Template, paste the payload template verbatim. Do not edit or modify the template. Do not paste it into a word-processing document first.
Set the request token encoding
Under Request Token Encoding, select JSON.
Set the response type
Leave Response type as None.
Create the webhook
Click CREATE to save the configuration.
Default payload template
If allGood support hasn’t given you a custom webhook template, you can use the following default template:
{ "First Name": {{lead.First Name}}, "Last Name": {{lead.Last Name}}, "Email": {{lead.Email Address}}, "Website": {{company.Website}}, "Company": {{company.Company Name}}, "Phone": {{lead.Phone Number}}, "Job Title": {{lead.Job Title}}, "SFDC Lead Id": {{lead.SFDC Id}}, "Mkto Lead Id": {{lead.Id}}, "State": {{lead.State}}, "Country": {{lead.Country}}, "Inferred Country": {{lead.Inferred Country}}, "Inferred State Region": {{lead.Inferred State Region}}, "Inferred Postal Code": {{lead.Inferred Postal Code}}, "Postal Code": {{lead.Postal Code}}}
You can copy this cleanly to your clipboard by using the button in the top-right of the above block.
3
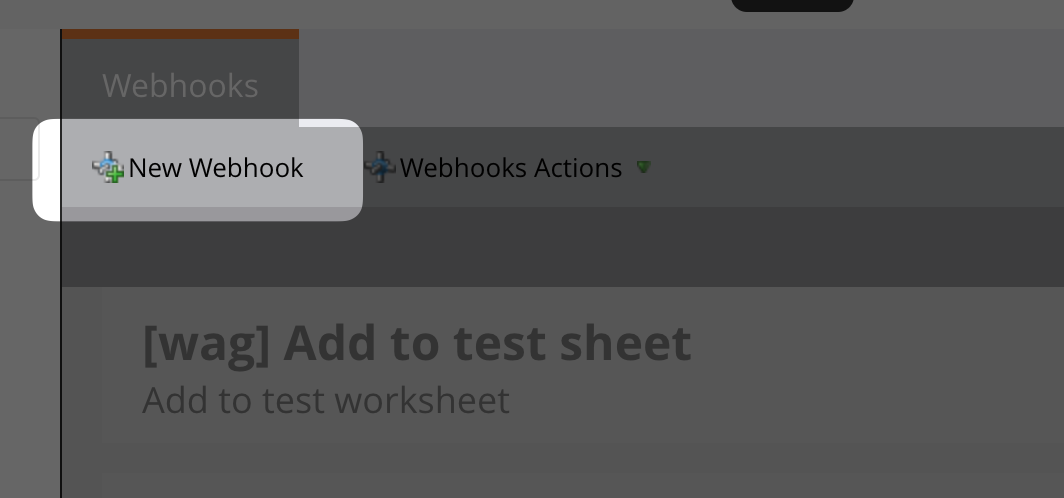
Navigate to the new webhook
After clicking CREATE, Marketo will navigate you to a different page in webhook settings!
Navigate back to the webhook you just created by clicking it in the right-panel navigation menu.
Click the webhook you just created in the right-panel navigation
4
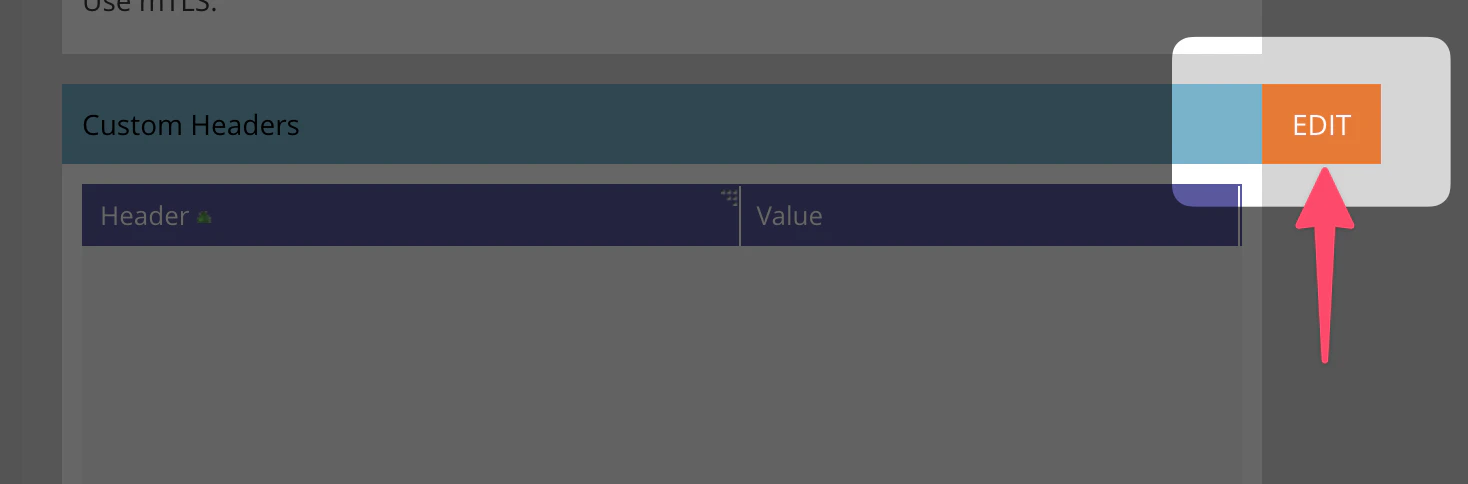
Add a Content-Type header
Once it’s created, you’ll need to add a custom header.Under Custom Headers, click EDIT.
Click EDIT in the Custom Headers section
Add a new header, set Header to Content-Type, and Value to application/json.
Adding the Content-Type: application/json custom header
Create a new Smart Campaign in an appropriate location, or use an existing one.
2
Configure the Smart List trigger
Under “Smart List”, trigger the campaign on the event you’re interested in.
This could be e.g. Fills Out Form, or any other lead-based trigger.
Add a filter which excludes any leads that have not consented to data processing, or who have opted out. This depends on how you implement GDPR in your Marketo instance.
3
Add the webhook action to the Flow
Under “Flow”, add a “Webhook” action, and pick the webhook you created in Marketo’s Admin page.
4
Configure the Schedule
Under Schedule, run each person through the campaign flow every time they enter the campaign.
If you get status code 400 errors, or see “Unparseable JSON” in the activity log when Marketo tries to call the webhook, this is almost always due to a configuration error in Marketo’s settings:
Check that you’ve copied the above template verbatim and in its entirety.
Certain document apps (Word, Google Docs, etc.) may silently add hidden formatting characters to the template if you paste it there first. To avoid this, copy the template directly from this page and paste it directly into Marketo.
Check that you’ve set up the Content-Type header as described above.
Check that you’ve just configured the right webhook—Marketo loves to sneakily navigate you to a different config page every time you save something.