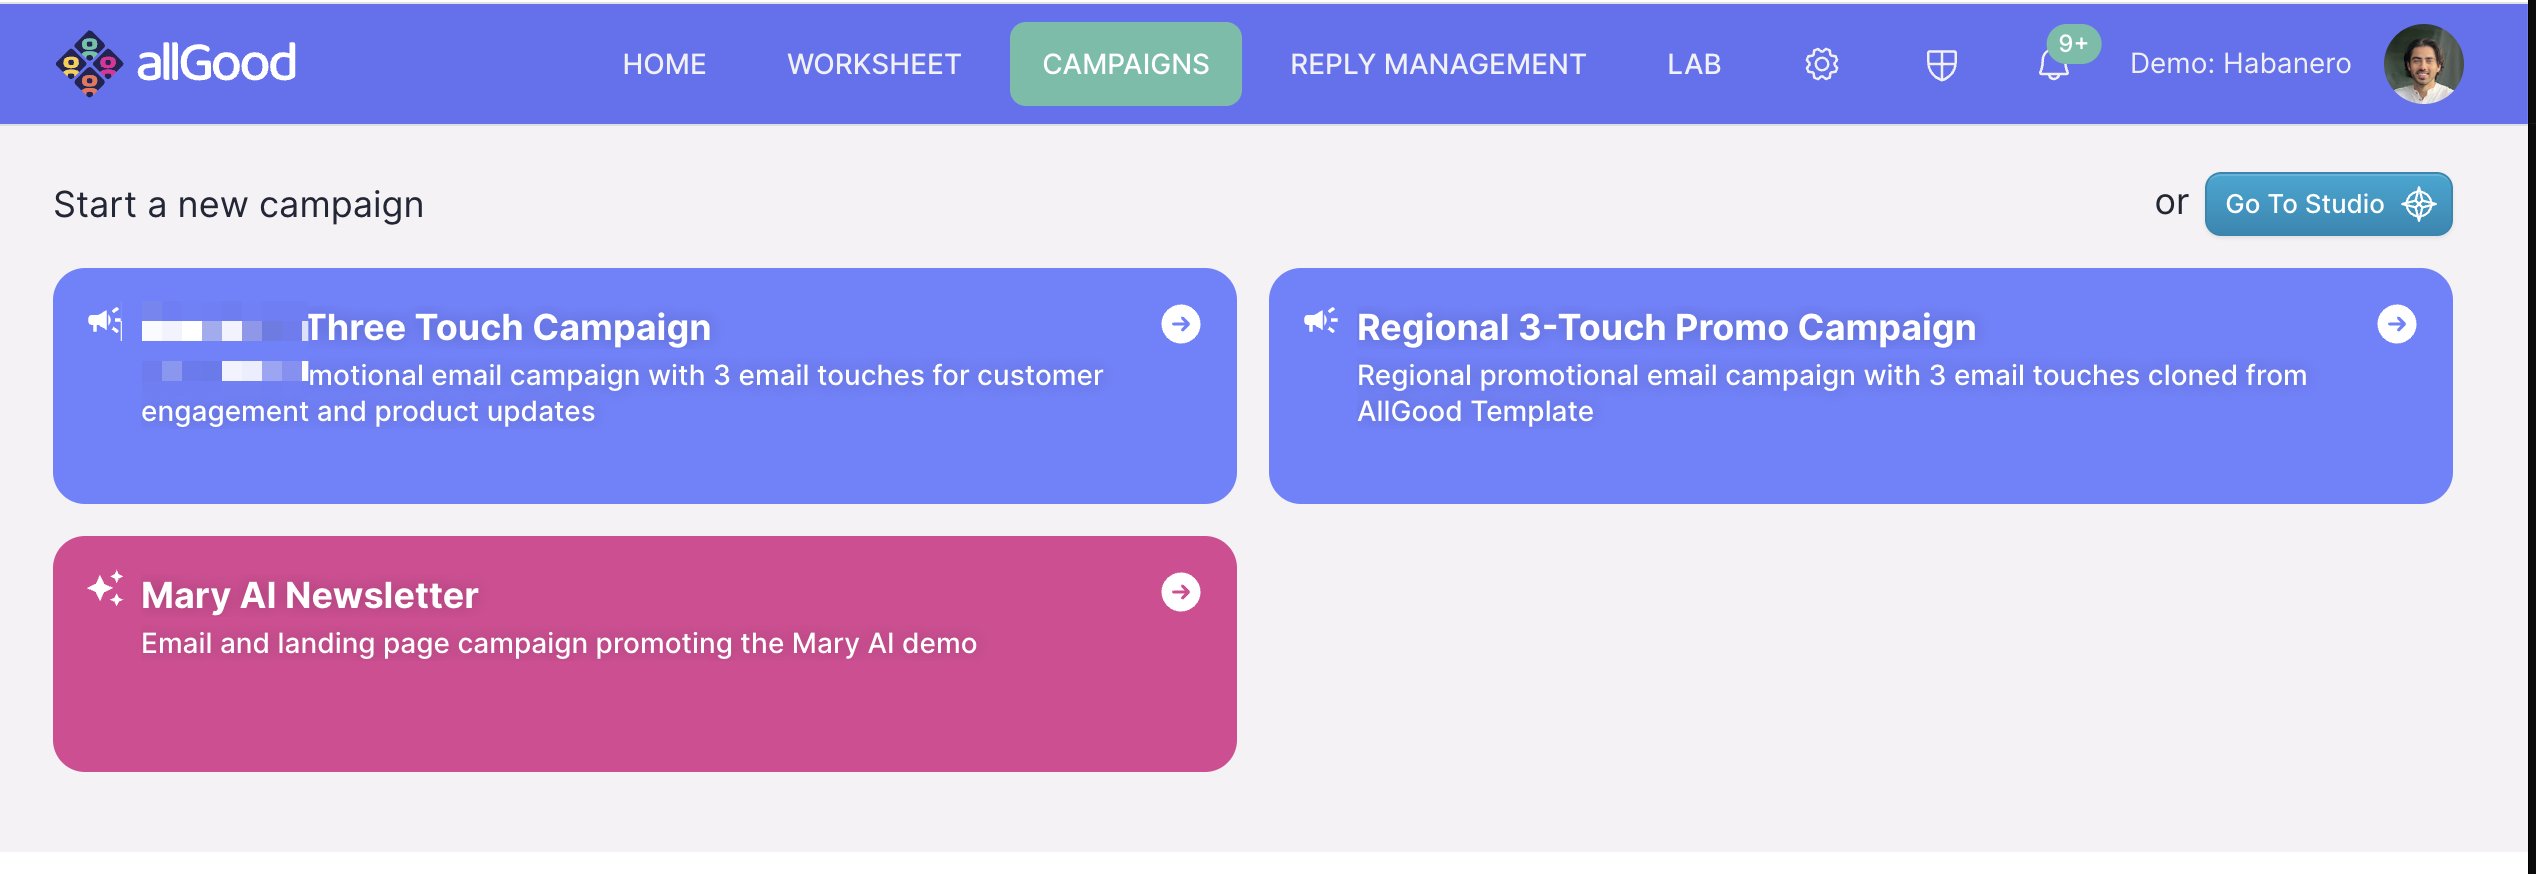
Overview
allGood’s Campaign Builder is where you go to turn your campaign content into a real, live marketing program—emails, landing pages, and everything in between. You don’t need to know how any of the technical tools work behind the scenes. You write your content, upload it, and Mary takes care of building everything for you. This guide walks you through exactly what to do at each step.Step 1: Choose a Campaign Type
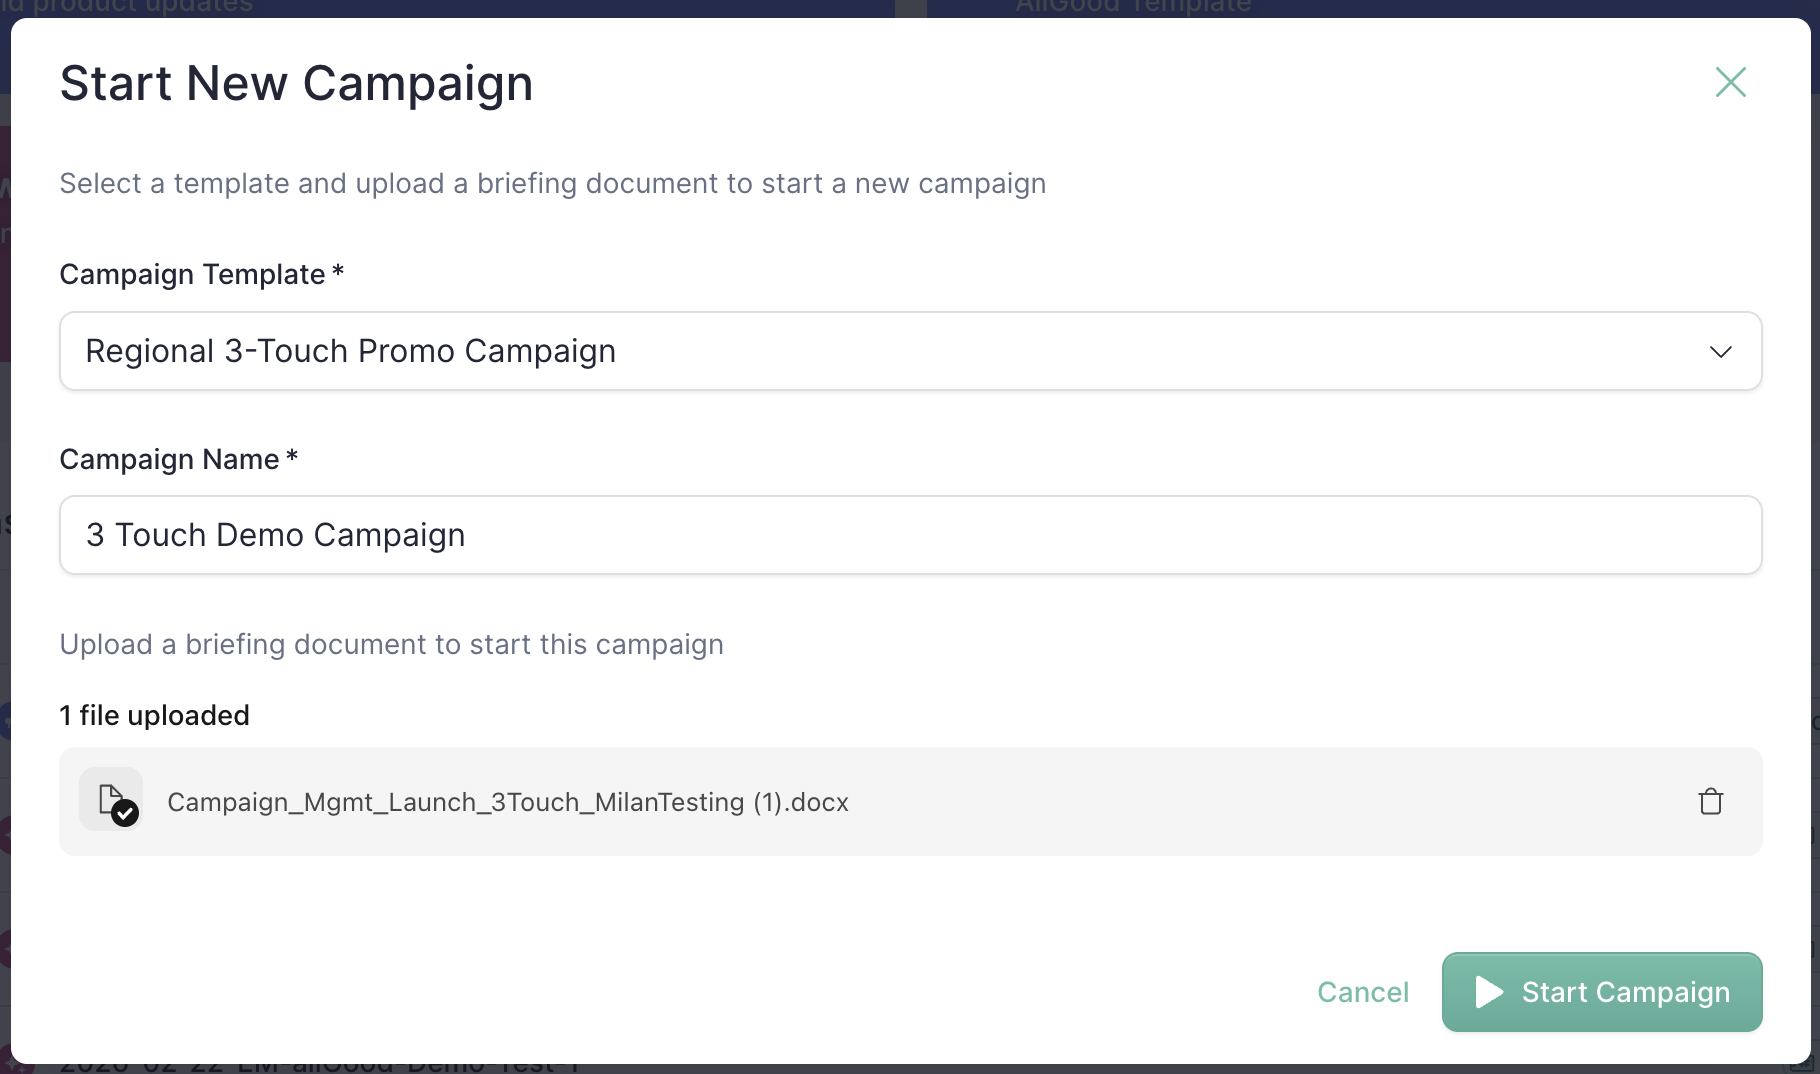
Step 2: Upload Your Campaign Brief

.docx) that contains all your campaign content—email copy, landing page text, dates, links, images, and so on. Think of it as your complete campaign plan in one document.
How to upload:
- From your computer: Drag and drop your Word document onto the upload area
- From Google Docs: Paste a shareable link to your Google Doc
Step 3: Name and Start Your Campaign
Step 4: Watch Mary Build Your Campaign
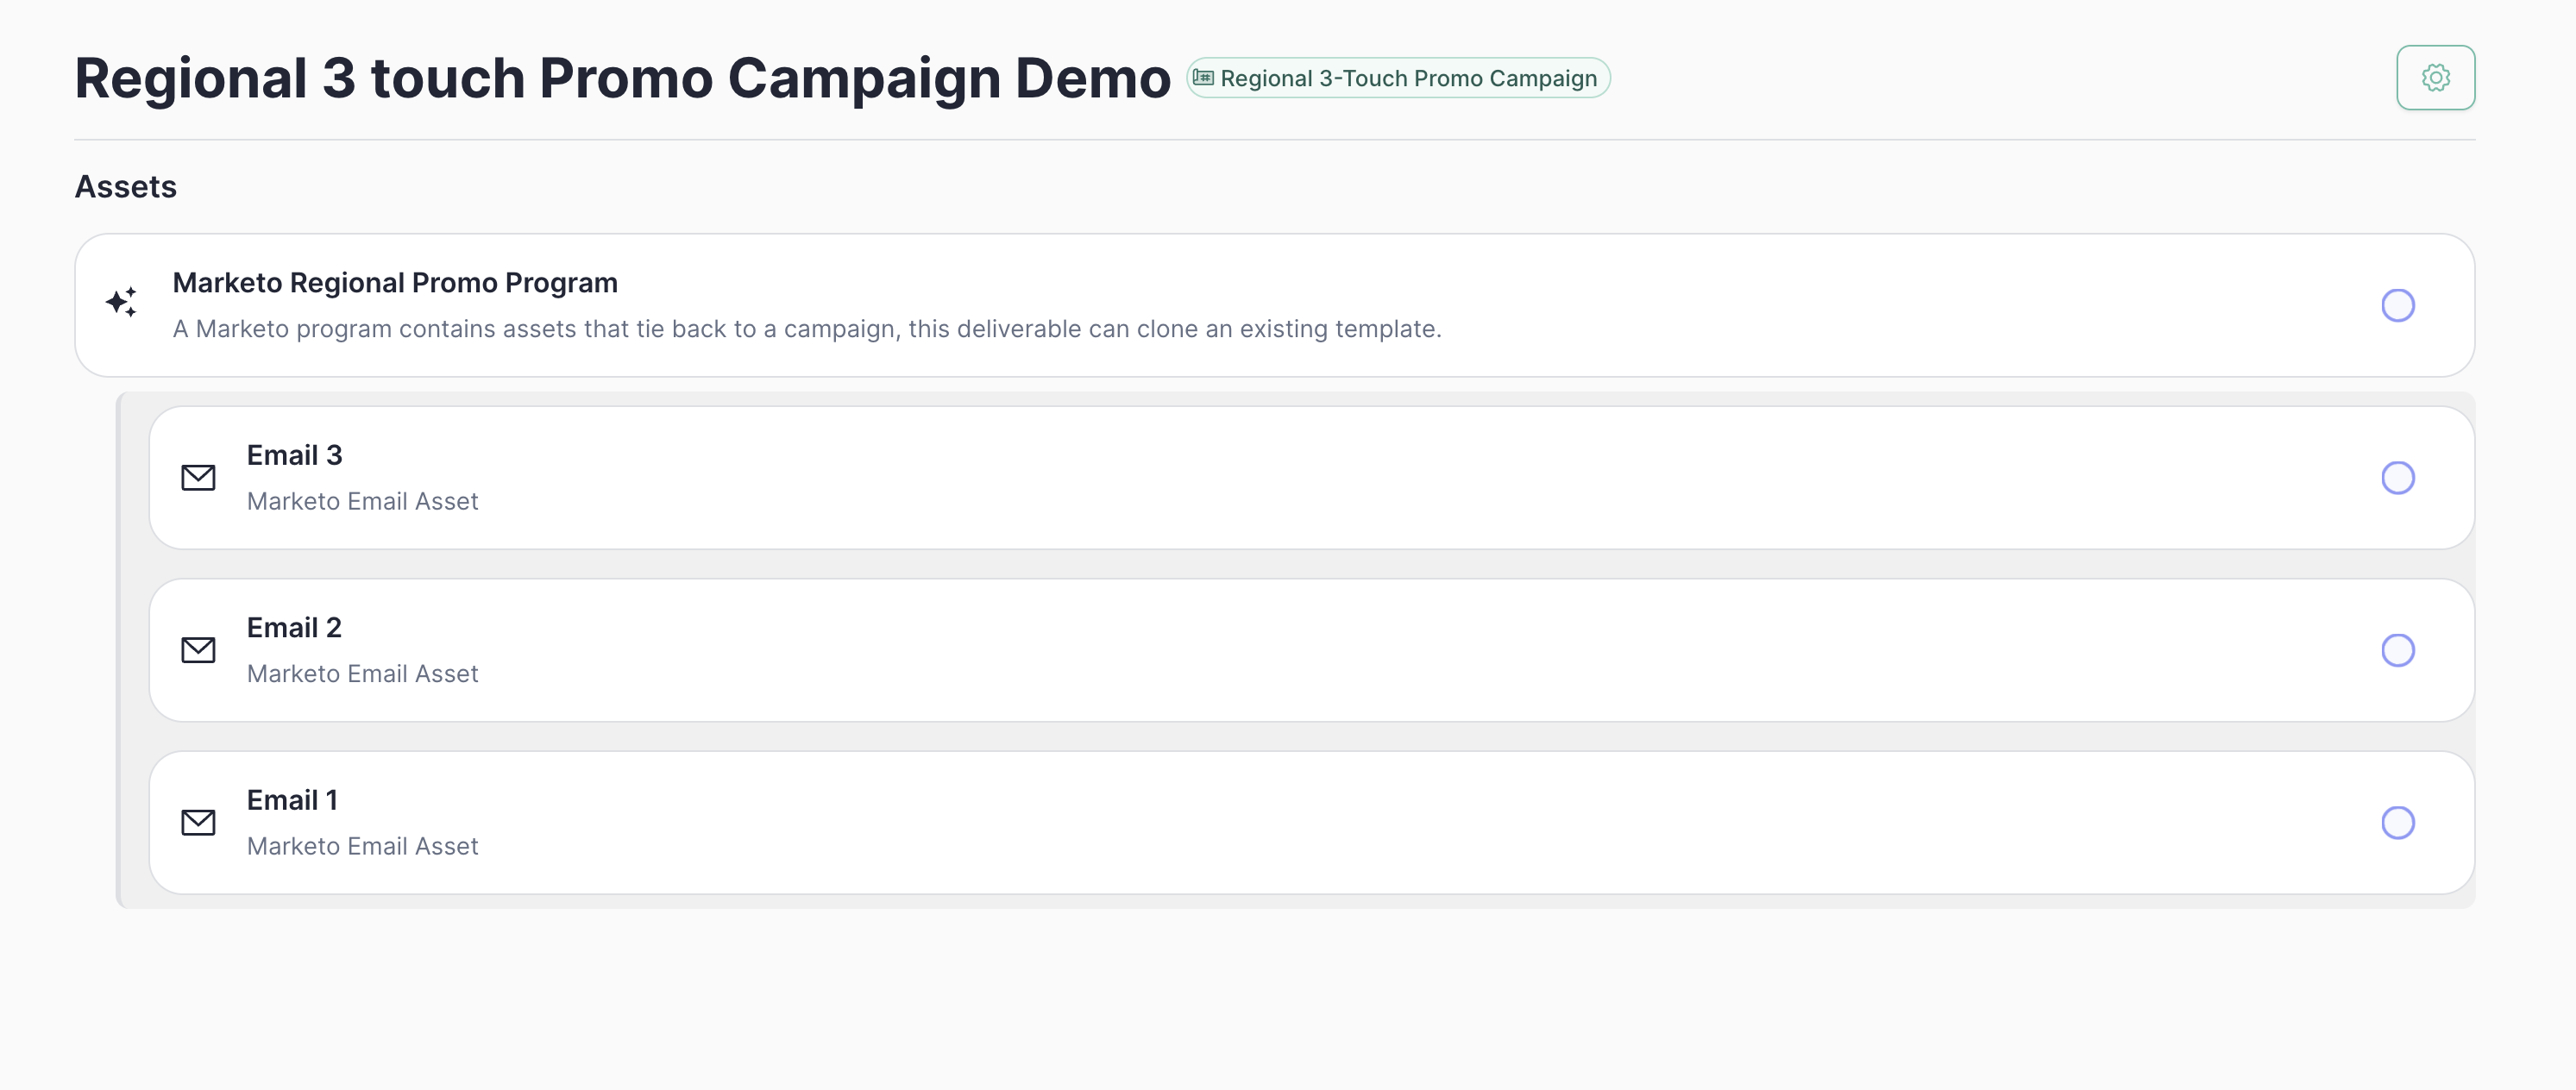
What the Statuses Mean
You don’t need to do anything during this step. Just wait for Mary to finish—it usually only takes a few minutes.
Step 5: Review and Make Edits

Mary Keeps Track of Everything
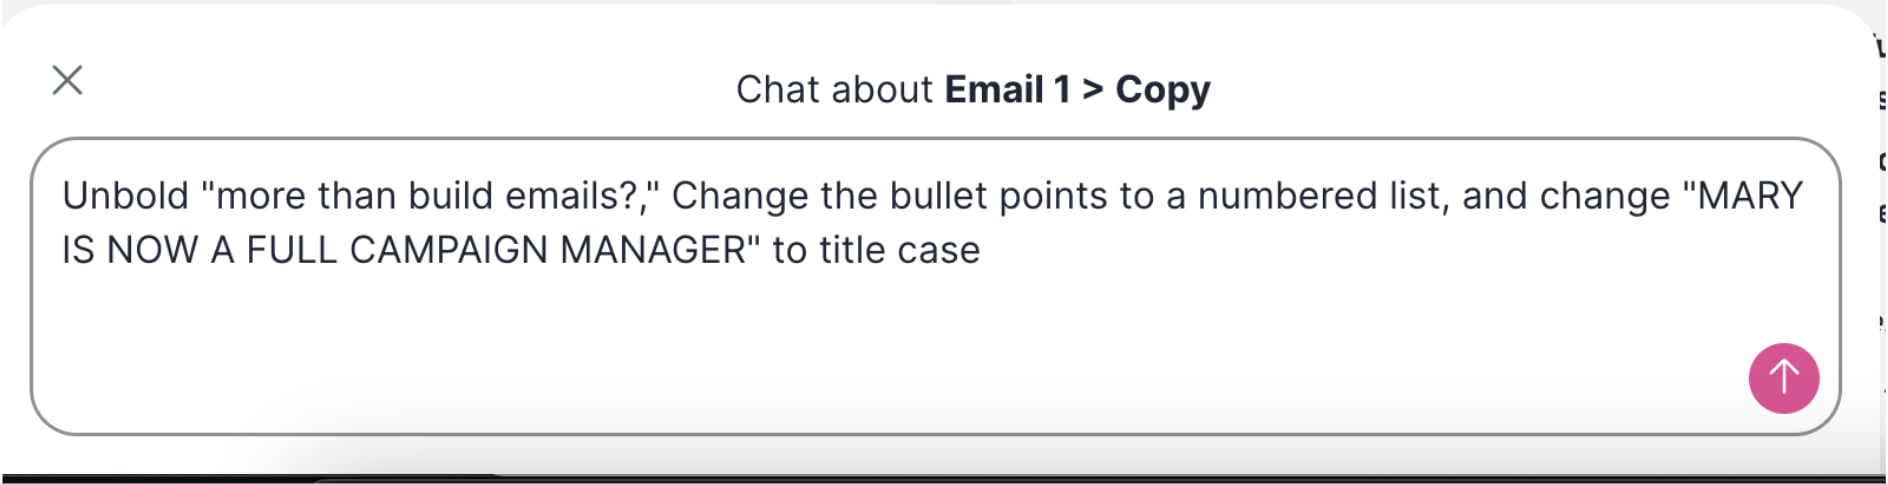
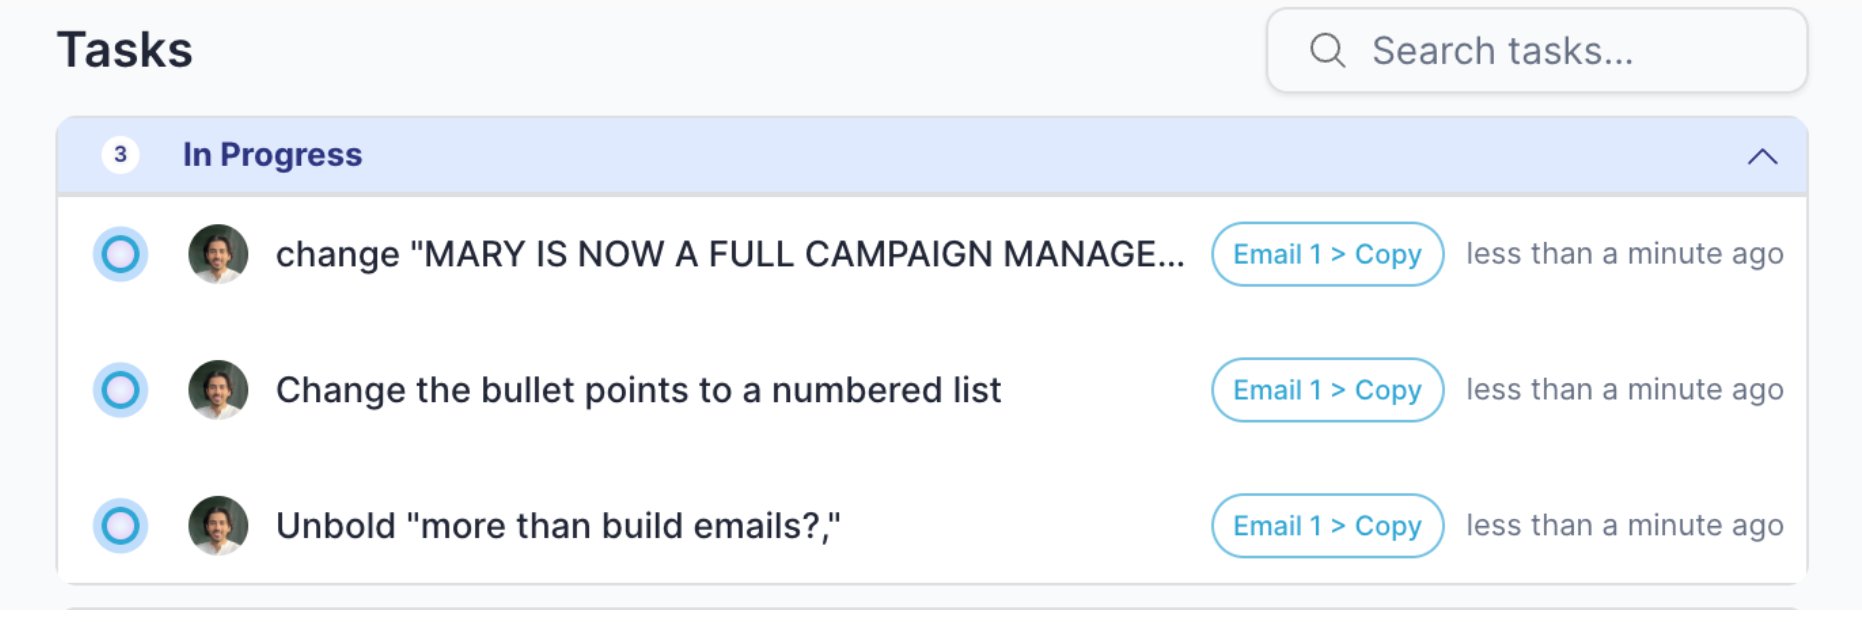
“Make the headline bold, change the button text to ‘Register Now’, and swap the banner image for this one [attach image]”Mary will handle each change separately and check them off as she goes.
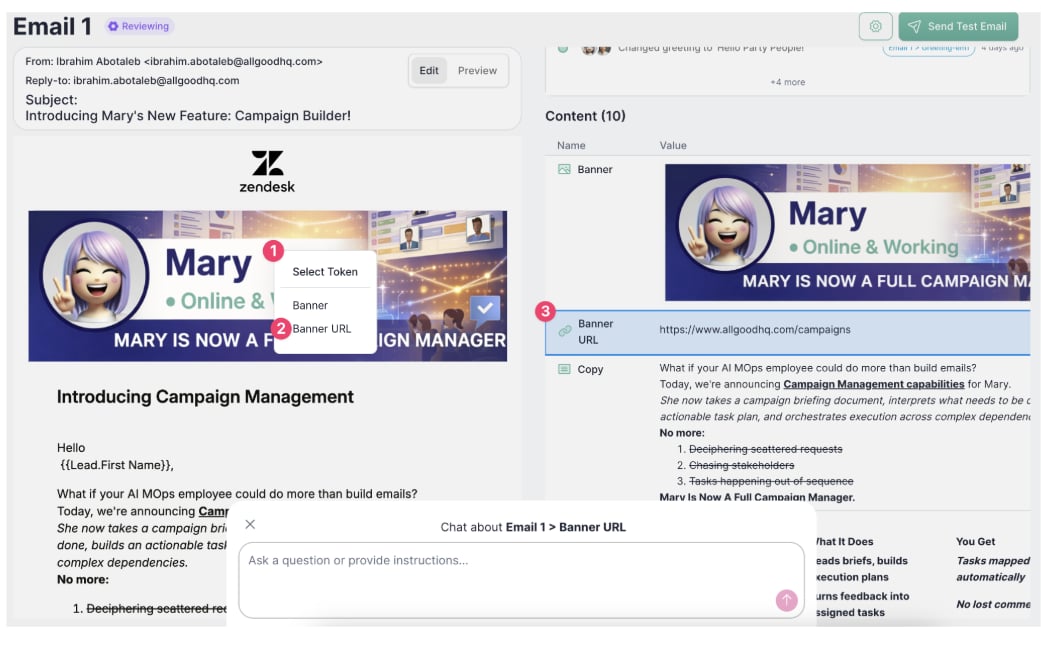
See Exactly How Your Email Will Look

Not Sure What to Change? Click on It.
Step 6: Approve and Go Live
Once you’re happy with how everything looks, it’s time to launch.- Review: Each item moves to “In Review” once Mary finishes building it
- Approve: Click the approve button, or tell Mary: “This looks good, please go ahead and launch”
- Go live: Mary publishes everything—your emails are activated, your landing pages are live
Step 7: After Launch
Once your campaign is live, Mary keeps an eye on things in the background—making sure your emails and landing pages are still working correctly.Common Questions
What if something looks wrong in the preview?
What if something looks wrong in the preview?
Click on the part that looks wrong to find out what it’s called, then tell Mary what you’d like changed. You can also just describe what you see: “The image at the top isn’t loading” and Mary will try her best to figure it out. Always feel free to reach out to your allGood CSM via Slack if Mary seems confused.
What if Mary asks me a question?
What if Mary asks me a question?
Sometimes Mary needs a little more information—like a missing link or a piece of content that wasn’t in your brief. Just respond to her question in the chat and she’ll continue where she left off.
Can multiple people review the same campaign?
Can multiple people review the same campaign?
Yes. Mary processes everyone’s requests in order and keeps a complete log of who asked for what and when, so nothing gets overwritten accidentally.
What if I need to make changes after the campaign goes live?
What if I need to make changes after the campaign goes live?
Just ask Mary in the same campaign. She can update content, fix broken links, or make adjustments even after everything is published.
Something went wrong—what do I do?
Something went wrong—what do I do?
If an item shows “Error” status, Mary will tell you what the problem is. You can also ask her directly: “What went wrong with this?” and she’ll explain in plain language and tell you how to fix it.
Tips for a Smooth Launch
- Put everything in your brief upfront. The more complete your brief, the faster Mary can build your campaign without needing to ask follow-up questions.
- Use clear section names in your brief. Headings like “Email 1 Subject Line” or “Landing Page Headline” make it easy for Mary to know where each piece of content belongs.
- Be specific when asking for changes. “Change the button in Email 1 to say ‘Sign Up Now’” is easier for Mary to act on than “update the button.”
- Use the click-to-identify feature. If you’re not sure what something is called, click it in the preview—Mary will show you the name so you can reference it directly.