This is a quick reference guide for marketing team members who want to launch
campaigns using Mary. No technical knowledge required—just follow these steps
in Asana and Mary handles the rest.
What You Need to Get Started
Before creating a campaign, have these ready:- Campaign Brief: A Word document (
.docx) with your campaign content - Campaign Name: A clear name for your campaign
Step-by-Step: Launch Your Campaign
1
Create an Asana Task
Open Asana and create a new task. Give it your campaign name as the title.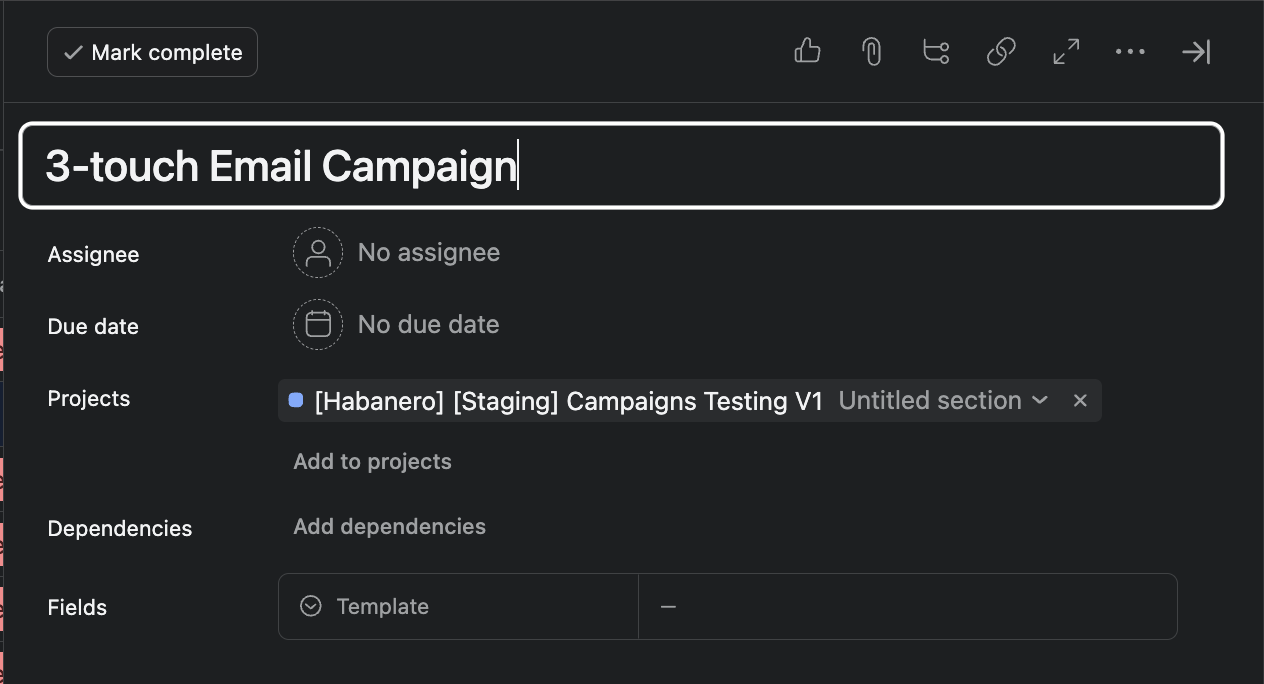
2
Attach Your Campaign Brief
Click the attachment icon and upload your Word document with all your campaign details.
3
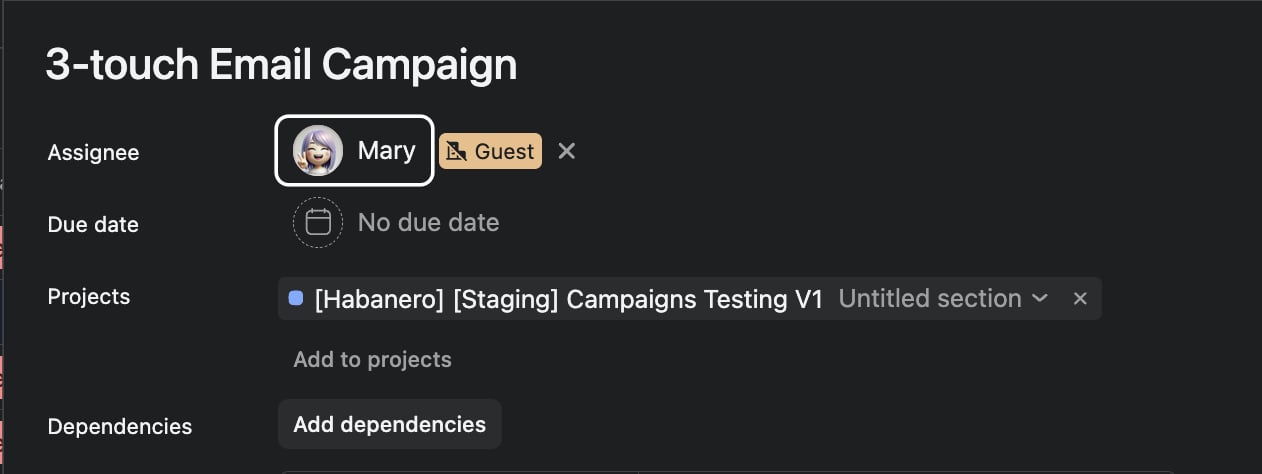
Add Mary to the Task
Click “Add collaborator” or “Assign task” and select Mary. This tells her to start working on your campaign.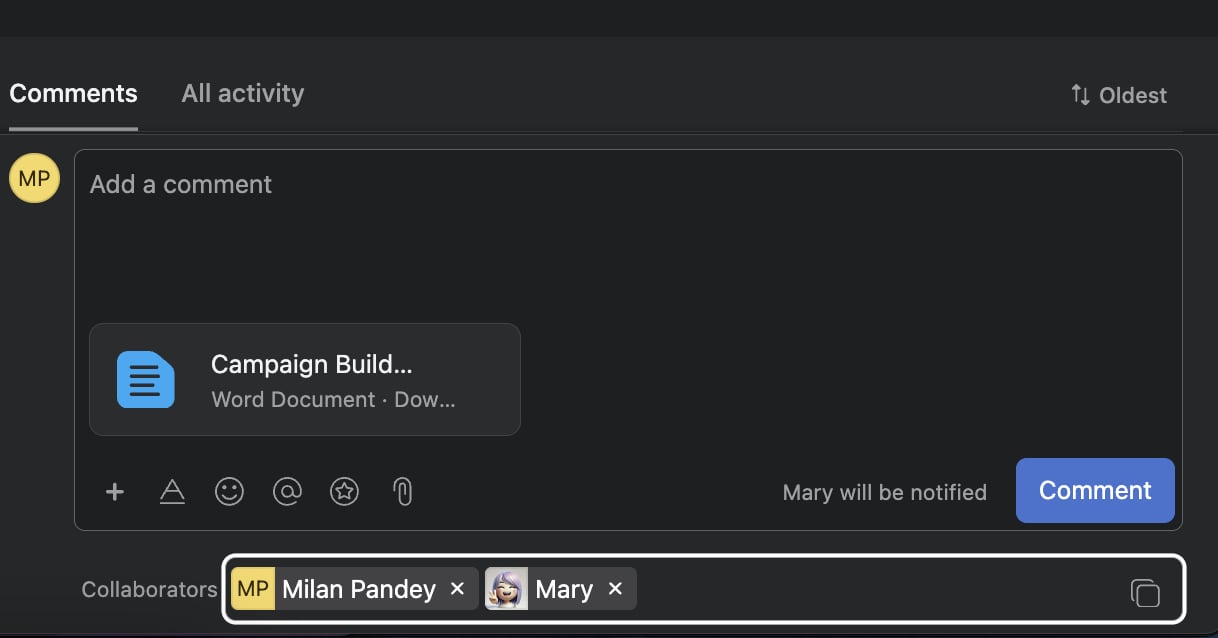
4
Answer Mary's Questions
Mary will review your brief and may ask questions if she needs more information. Just reply in the task comments by typing 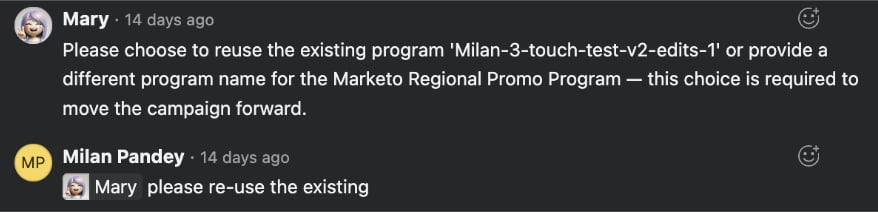

@Mary followed by your response.Example: “@Mary update the subject line to [Subject]”Here are some examples of what Mary will ask for in Asana:5
(Optional) Open the Live Email Editor in allGood
While Mary works in Asana, you can also jump into the allGood platform to review your emails in real time.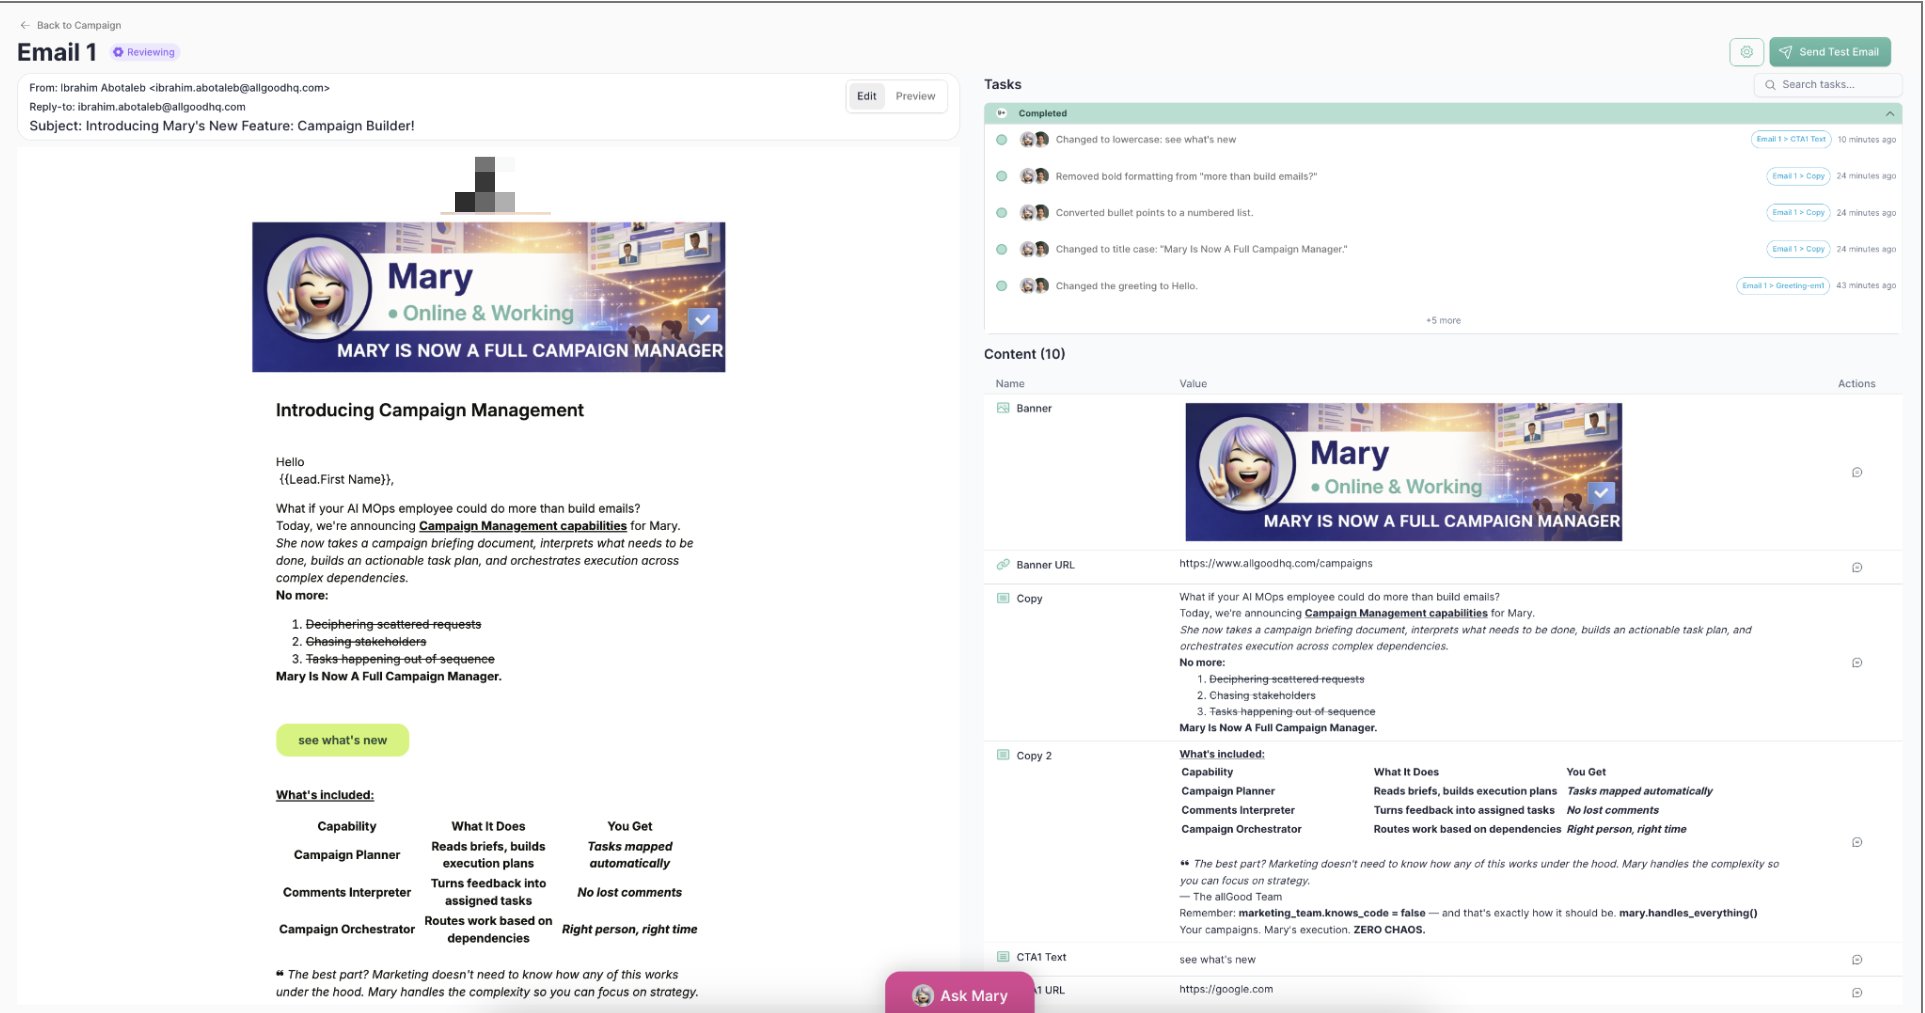
Live Email Preview
- Real-time updates: As Mary completes tasks, the preview refreshes automatically
- Side-by-side view: Task list stays visible so you can track progress
- Actual content: All content is displayed exactly as it will appear in the email
- Proper layout: Images, CTAs, and text blocks display in the correct structure
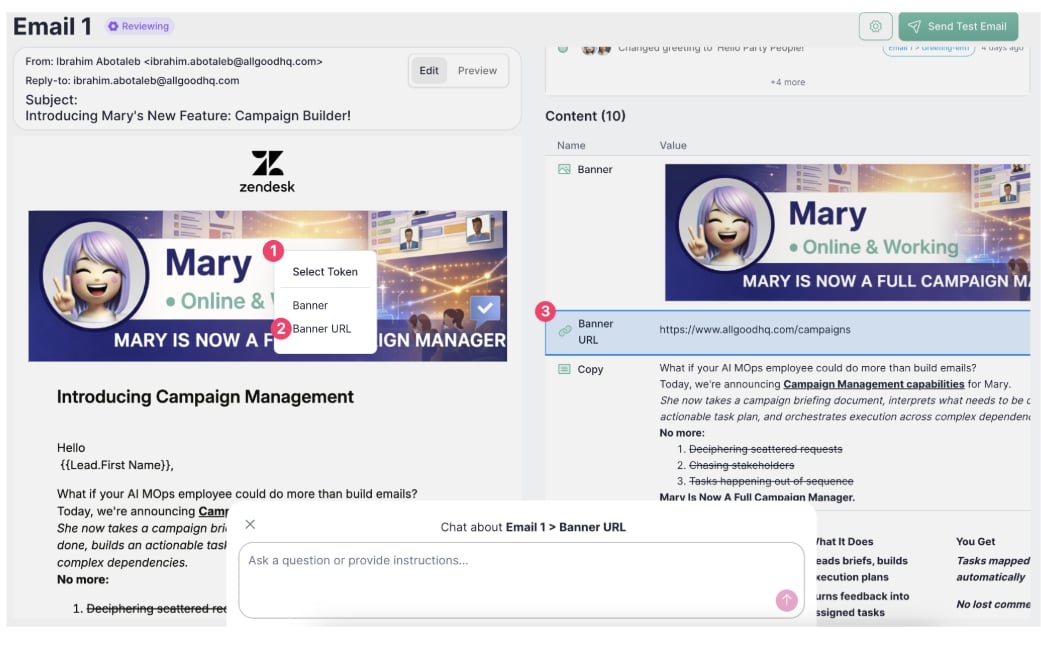
Content Field Highlighter
- Content section name (e.g., Banner, Banner URL)
- Current value (the actual content or URL)
- Where it comes from (campaign-wide default or asset-specific override)
- Precise edits: Know exactly which field controls which content
- Inheritance visibility: See if content is inherited from the campaign or specific to this asset
- Quick troubleshooting: If an image won’t load or a link is broken, you immediately know which field to fix
Instead of describing “the hero image” or “the CTA,” you can click the section and reference the exact field name. No more ambiguity in feedback. No need to understand Marketo.
6
Review Test Emails
Mary will automatically send you test versions of your emails. Check them in your inbox and make sure everything looks good.What to check:
- Does the content look right?
- Are the images showing correctly?
- Do the links work?
- Is the formatting clean?
7
Request Changes (Optional)
If you need to make changes, just tell Mary in the Asana comments using plain language:Mary will make the changes and send updated test emails.
8
Approve and Launch
When everything looks perfect, tell Mary to launch:
“@Mary this looks good, please launch the campaign”Mary will activate everything and your campaign will go live.
Common Questions
What if Mary finds an existing campaign with the same name?
What if Mary finds an existing campaign with the same name?
Mary will ask you to confirm. If you want to update that existing campaign, say yes. If you want a new campaign, give her a different name.Tip: Add dates to your campaign names to avoid confusion (e.g., “Product Launch - March 2025”)
How long does it take?
How long does it take?
Once you submit your brief, Mary typically has your campaign ready for review within minutes. Complex campaigns with multiple emails might take a bit longer.
Can I make changes after launching?
Can I make changes after launching?
Yes! Just ask Mary in the same Asana task. She can update content, pause sends, or make corrections even after launch.
What if I make a mistake in my brief?
What if I make a mistake in my brief?
No problem! Mary will catch missing information and ask for it. You can also fix mistakes by requesting changes before approval.
Who receives the test emails?
Who receives the test emails?
By default, test emails go to you and your marketing team. You can ask Mary to send to specific people: “@Mary send test emails to john@company.com”
What happens if something goes wrong?
What happens if something goes wrong?
Mary will tell you exactly what the issue is and how to fix it. You can also ask her: “@Mary what went wrong?” and she’ll explain.
Quick Tips for Success
- Be Descriptive: The more detail in your brief, the less back-and-forth with Mary
- Use Clear Names: Include dates and campaign type in your task titles
- Review Carefully: Check those test emails thoroughly before approving
- Ask Questions: Mary understands plain language—just ask if you’re unsure
Campaign Brief Template
Not sure how to build a propper campaign brief that Mary can understand? Click here to learn more about creating a campaign brief template.Need Help?
You can ask Mary anything directly in your Asana task:Remember: Mary handles all the technical setup behind the scenes. You
focus on your campaign content and strategy—she takes care of the rest.