Overview
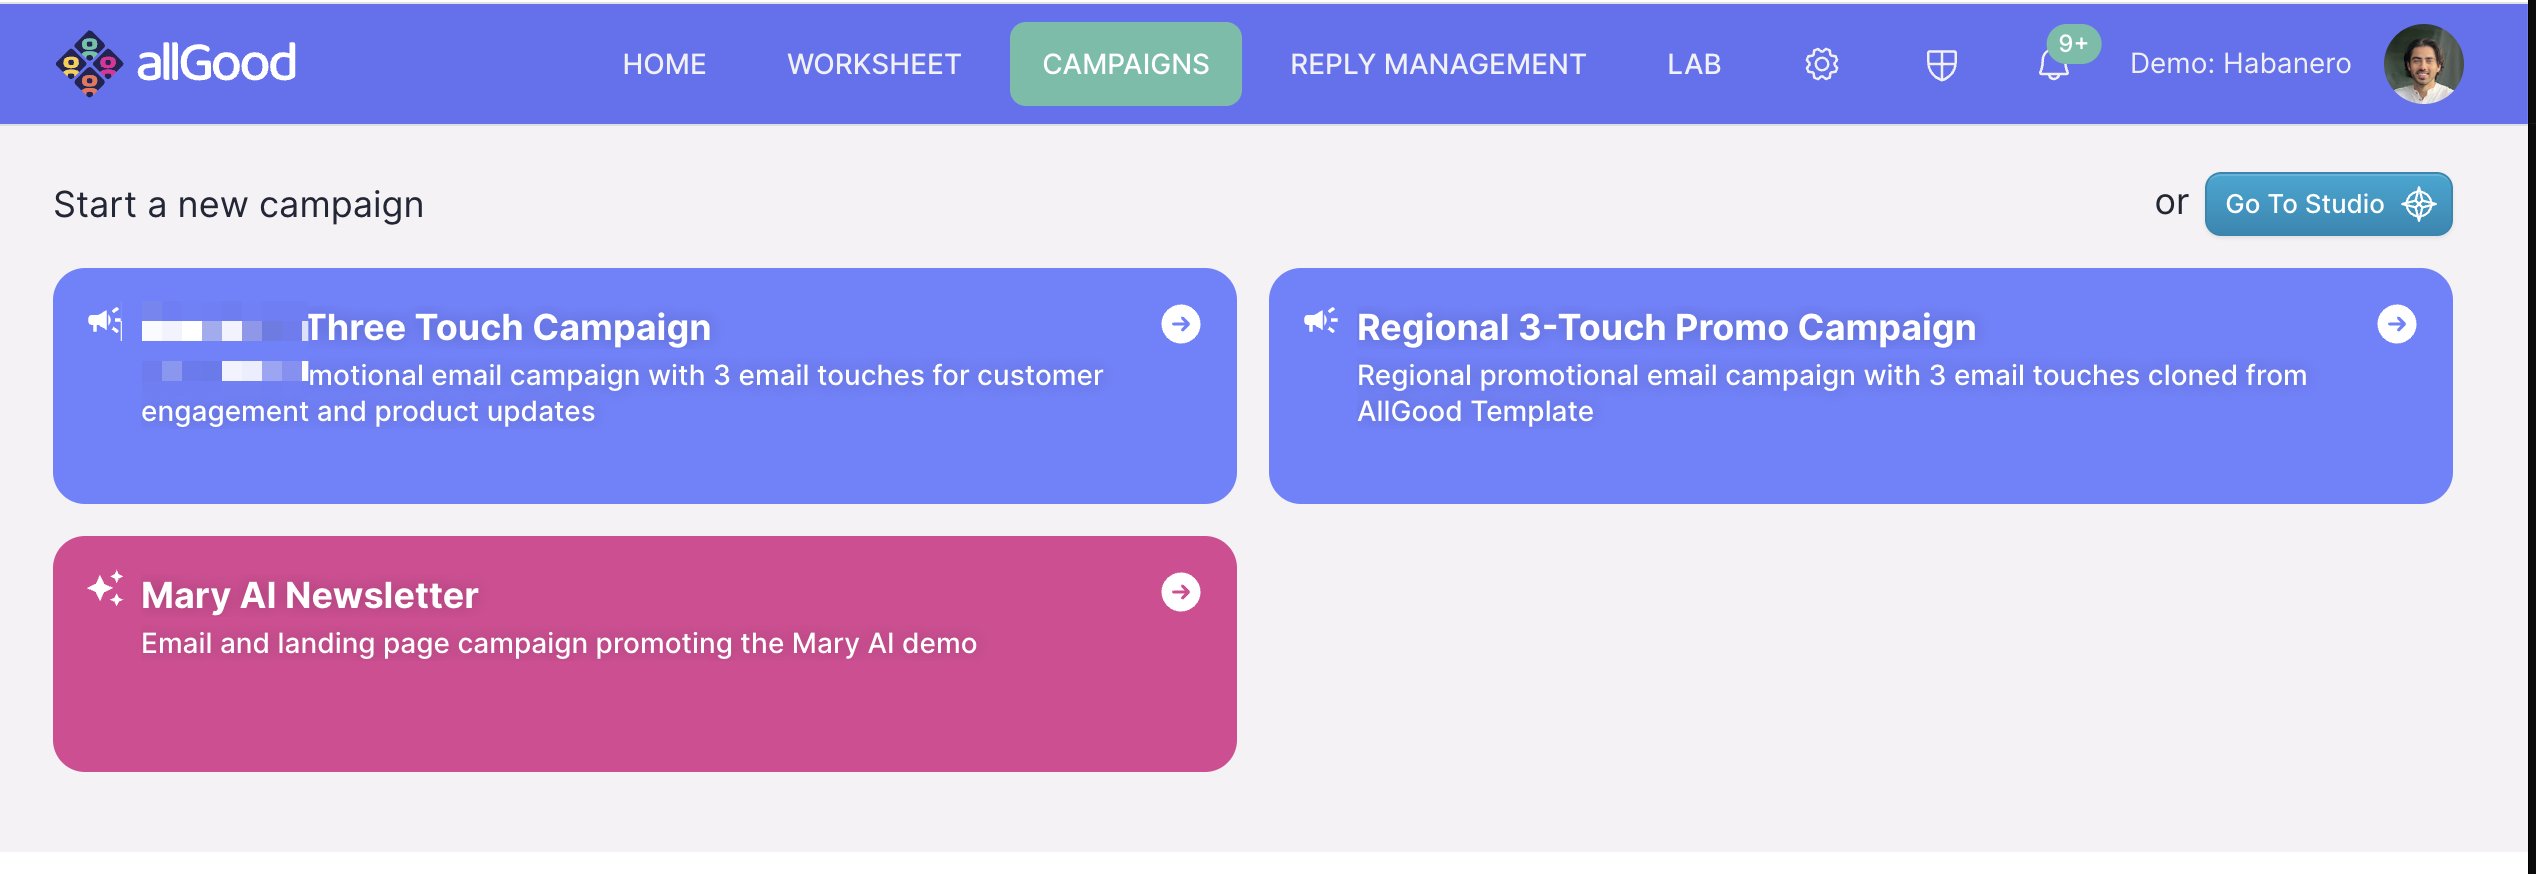
The Campaign Builder is where you turn your campaign briefs into live marketing programs. This guide walks through the complete workflow from campaign setup to launch, designed for marketing ops teams who need full visibility and control over their campaigns. The Campaign Builder follows a clear workflow that keeps strategy separate from execution. You provide the campaign brief, select a campaign template that matches your program type, and Mary handles the heavy lifting—creating assets, checking everything is set up correctly, and managing all the connections across your marketing tools.Step 1: Select Campaign Template
- What gets created: Emails, landing pages, Marketo programs, Salesforce campaigns, etc.
- What’s required: Program IDs, folder paths, UTM parameters, campaign member statuses
- Automation steps: How Mary builds, deploys, and monitors your campaign
- Content requirements: Which content fields are required and which are optional
Templates are versioned, so when you create a campaign, it locks to that specific template version. This means your campaign won’t break if the template gets updated later.
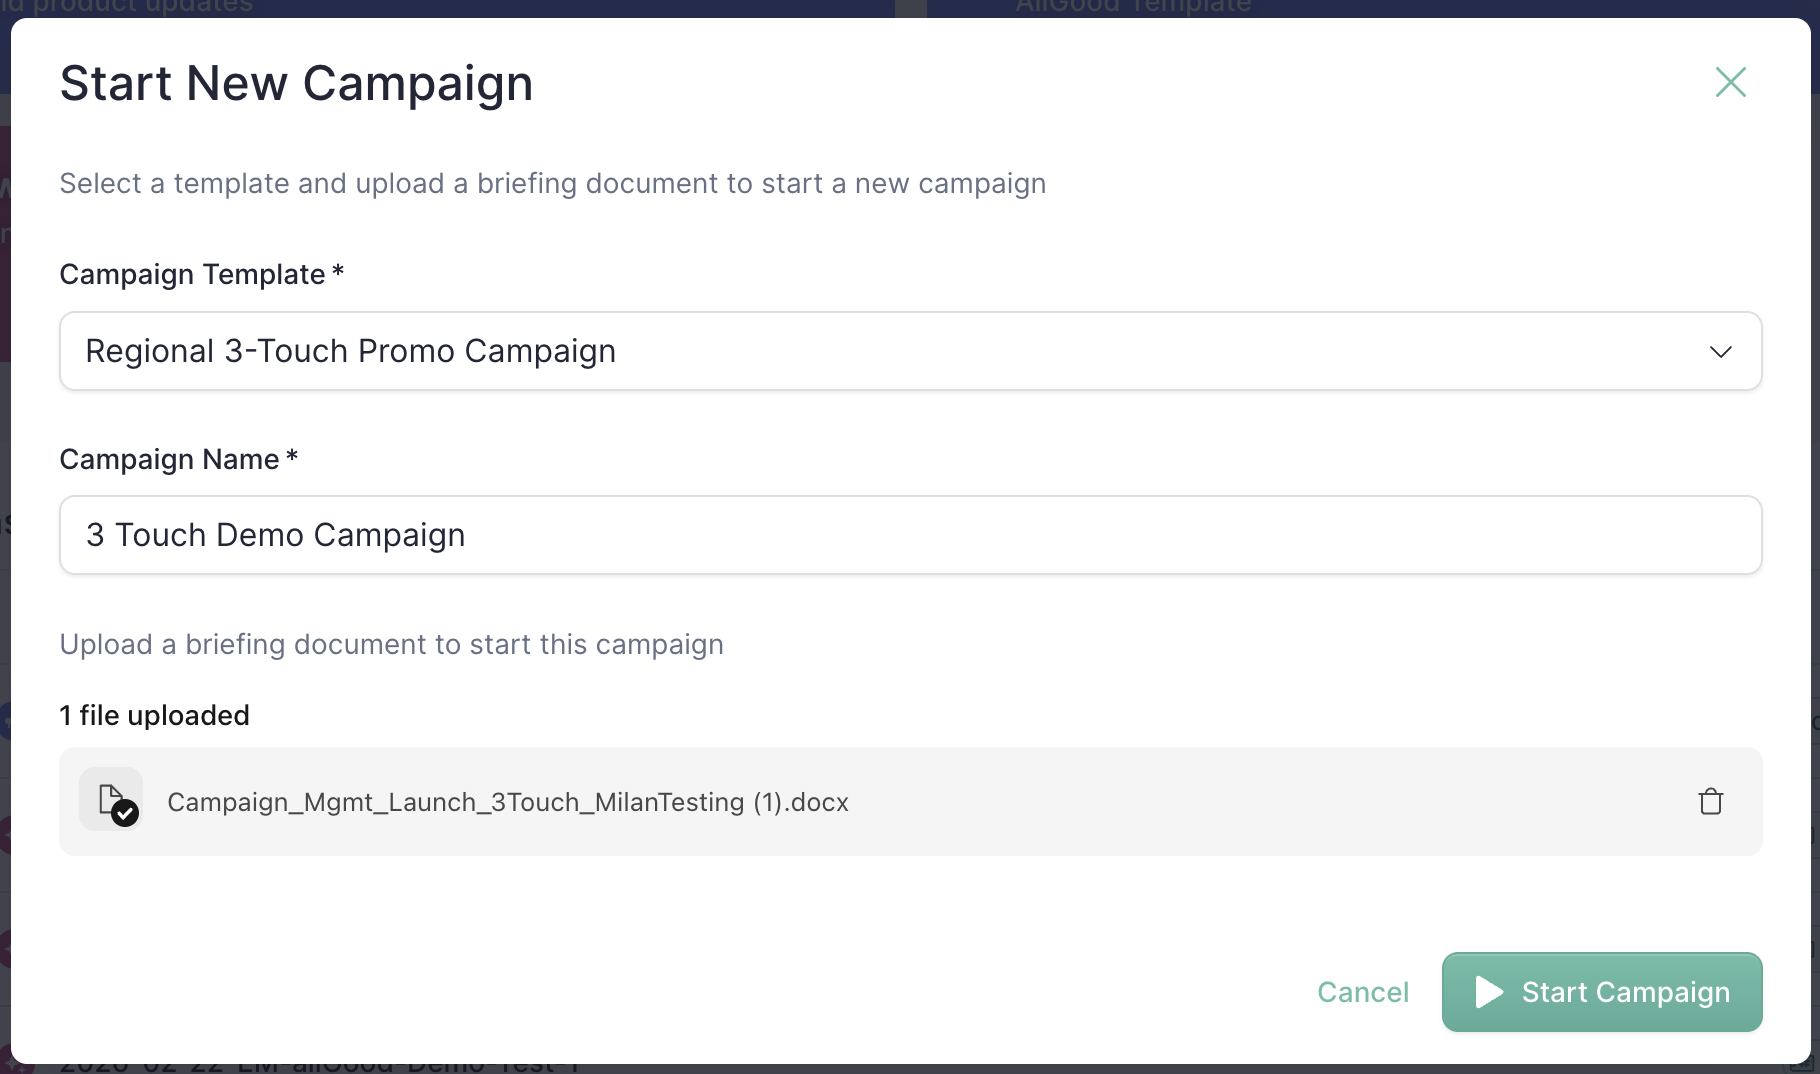
Step 2: Upload Campaign Brief

How to Upload
- From your computer: Drag and drop
.docxfiles or Word documents - From Google Docs: Paste a Google Docs link (make sure sharing is set so Mary can access it)
What Happens When You Upload
Mary reads through your brief and extracts the key information:- Document structure: Your H1 and H2 headings become the navigation for your campaign
- Content extraction: Mary identifies which content maps to which asset
- Campaign details: Dates, owners, program IDs, compliance requirements
- Content formatting: Converts your brief into a format that works efficiently with AI
If you would like to make any larger changes to your content, feel free to make changes to your doc and then resubmit it.
Step 3: Start Campaign
- Campaign record with Draft status
- Asset placeholders for each deliverable (emails, landing pages, etc.)—all starting in Draft
- Content library organized by asset
- Activity log for tracking all changes
Step 4: Campaign Overview & Asset Status
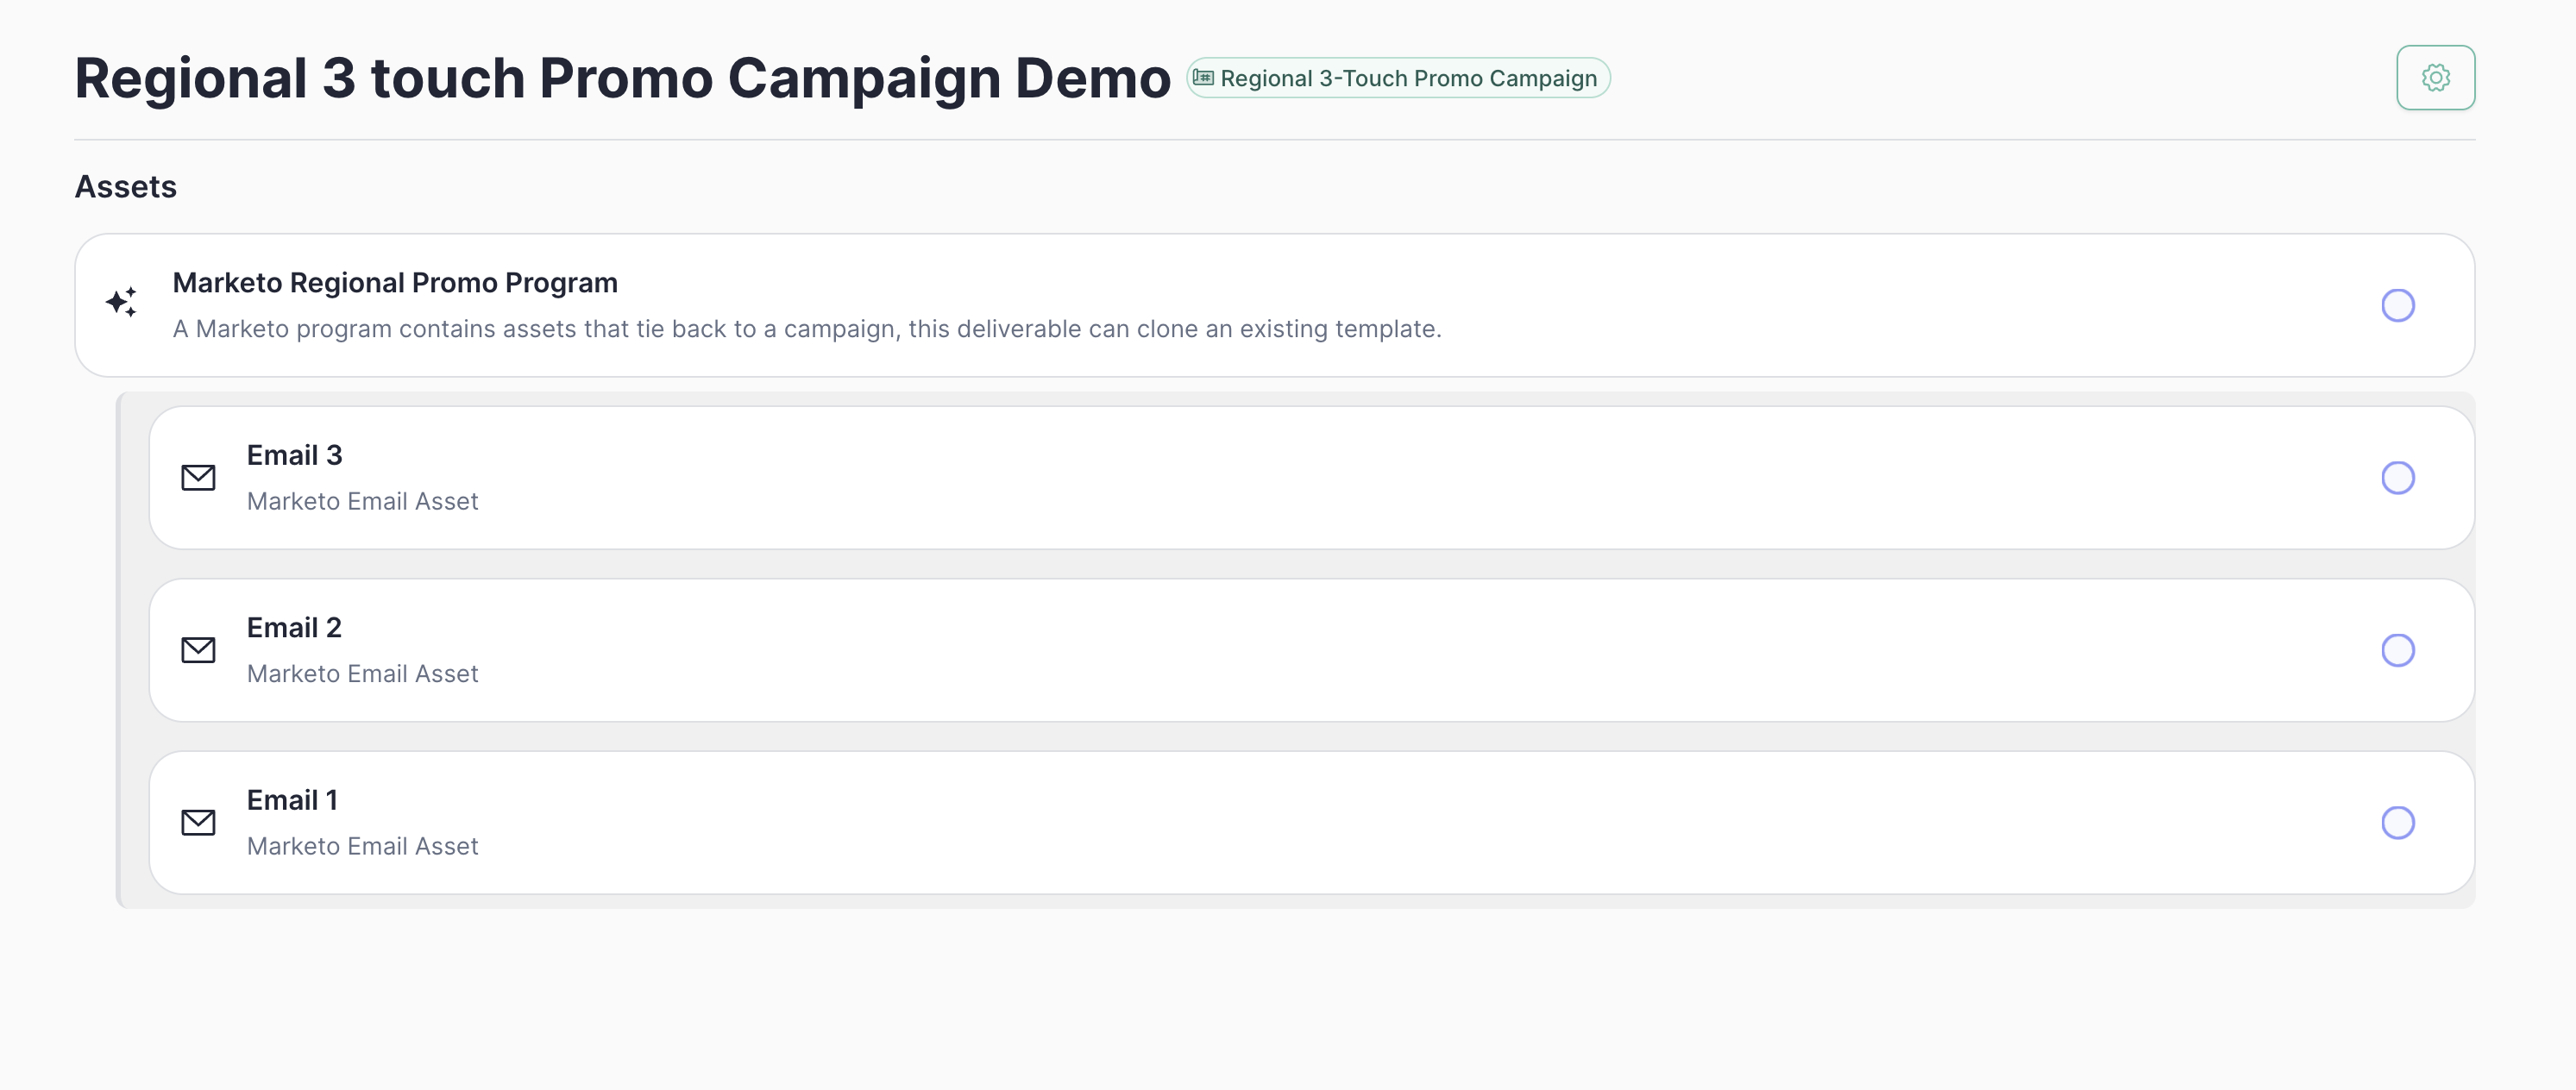
- Status: Draft → In Review → Ready → Live → Done (or Error if something goes wrong)
- Asset type: Marketo program, email, landing page, Salesforce campaign, etc.
- Last update: Most recent activity from the log
Understanding Asset Status
What’s Mary doing? For each asset, Mary runs quality checks that:
- Validate all required content is present
- Check image URLs are secure (HTTPS only)
- Verify CTA links follow your standards (HTTPS, approved domains, UTM parameters)
- Build draft versions with all content in place
- Log everything for your records
Step 5: Editing & Mary’s Task Management

Mary’s Task List
Every asset has its own task list. Mary tracks everything that needs to be done:- In Progress: Tasks Mary is actively working on
- Completed: Finished changes with timestamps
- Needs Attention: Items blocked by missing information or validation errors
If Mary can’t complete something (missing URL, unclear request, validation failure), she’ll flag it in “Needs Attention” and explain exactly what’s blocking her.
Making Multiple Changes at Once
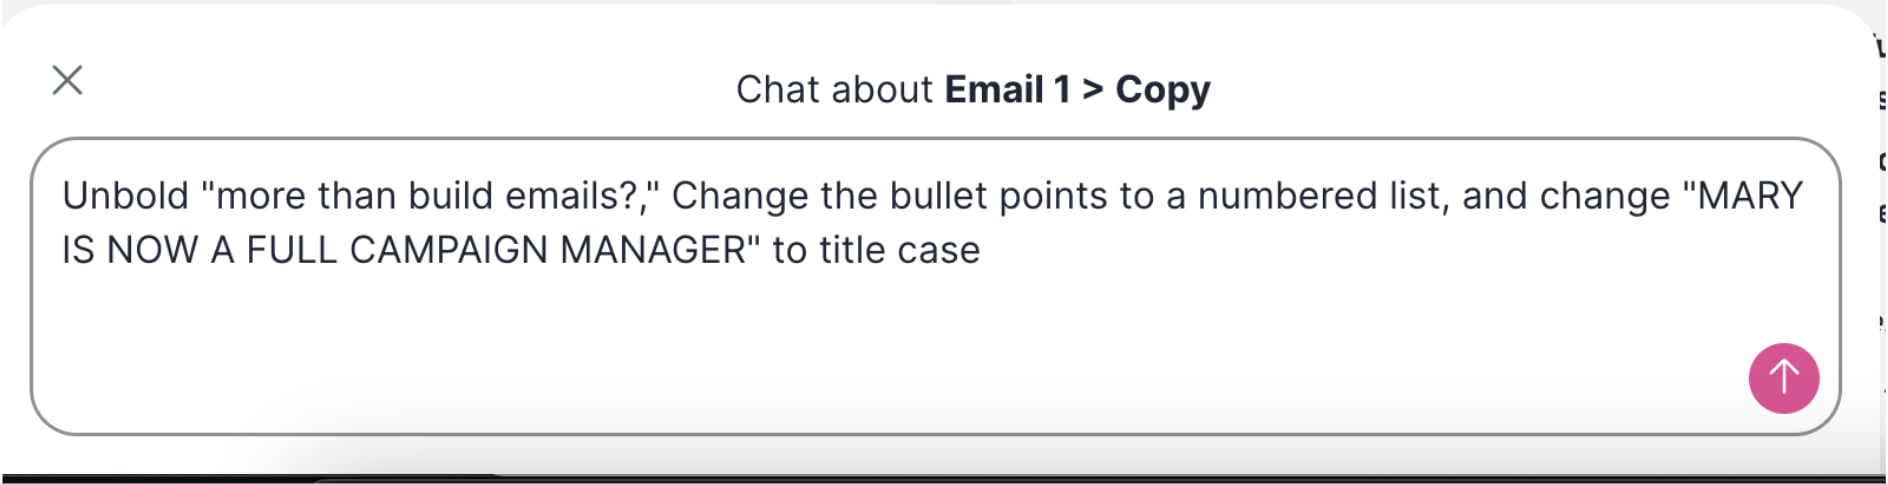
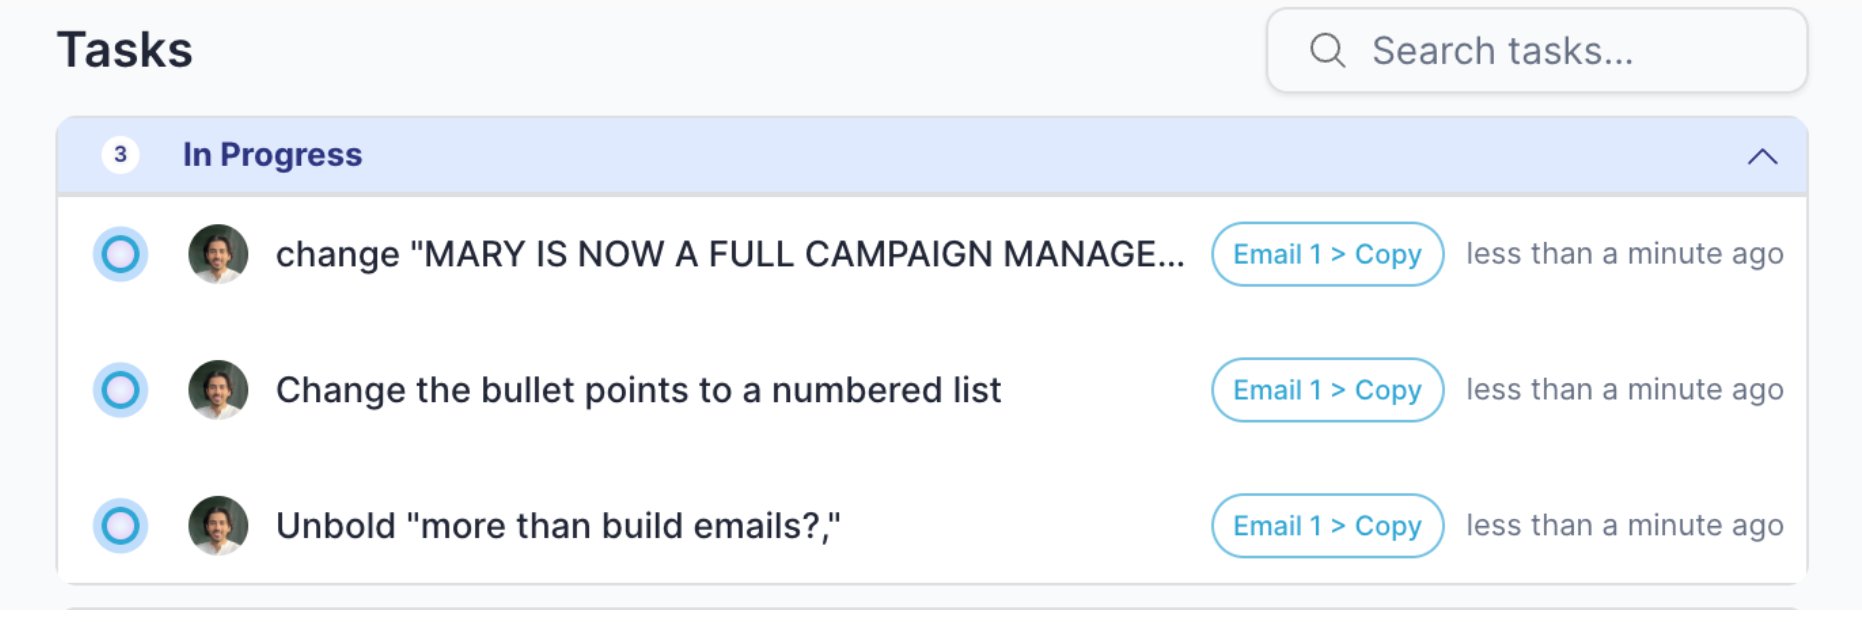
“@Mary unbold ‘more than build emails?’, Change the bullet points to a numbered list, and change ‘MARY IS NOW A FULL CAMPAIGN MANAGER’ to title case”Mary breaks this into separate tasks. Each one gets:
- Its own line item in the task list
- Clear assignment to the right content field
- Individual completion tracking
- Independent execution (if one is blocked, the others still get done)
Live Email Preview

- Real-time updates: As Mary completes tasks, the preview refreshes automatically
- Side-by-side view: Task list stays visible so you can track progress
- Actual content: All Marketo tokens show their real values
- Proper layout: Images, CTAs, and text blocks display in the correct structure
Content Field Highlighter
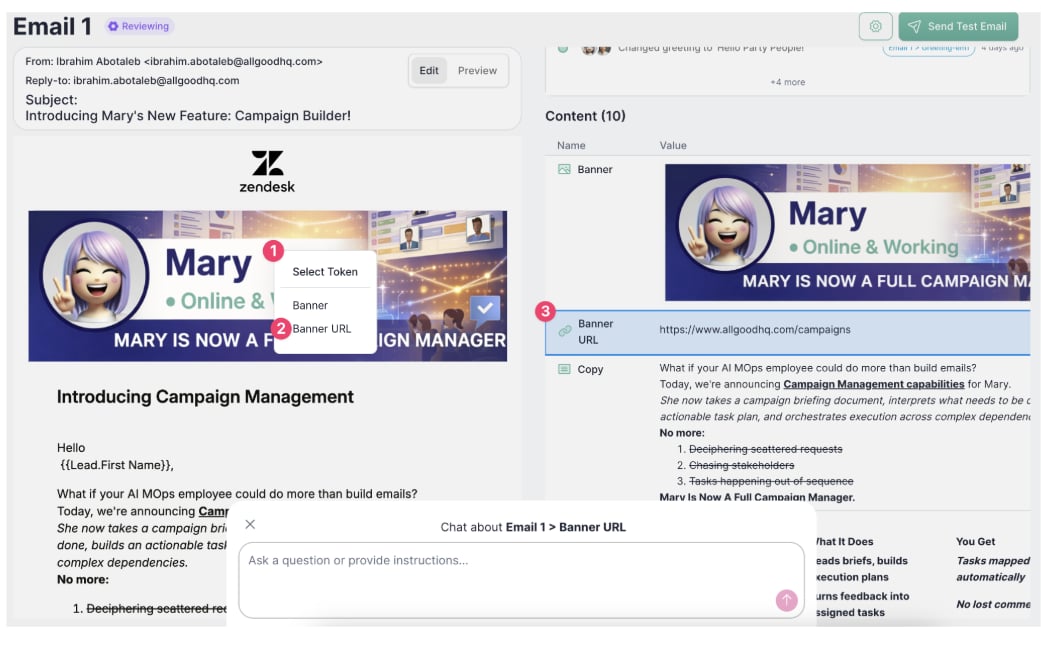
- Token name (e.g., Banner, Banner URL)
- Current value (the actual content or URL)
- Where it comes from (campaign-wide default or asset-specific override)
- Precise edits: Know exactly which field controls which content
- Inheritance visibility: See if content is inherited from the campaign or specific to this asset
- Quick troubleshooting: If an image won’t load or a link is broken, you immediately know which field to fix
Step 6: Approve and Launch
Once all edits are complete and validation passes:- Review: Asset moves to In Review after passing all checks
- Approve: Click approve (or let Mary auto-approve if that’s configured in your template)
- Deploy: Mary launches the asset, which means she:
- Creates or updates assets in Marketo
- Gets back confirmed IDs and URLs
- Logs all outcomes in your activity log
- Live: Asset shows as Live with direct links to edit or preview in your marketing tools
What Gets Created
Depending on your template, Mary can create:- In Marketo: Programs, emails (with all tokens populated), landing pages, smart campaigns
- Other integrations: Goldcast events, Zoom webinars
Step 7: Monitoring and Maintenance
After launch, Mary periodically checks that:- Assets are still live (URLs work, programs exist)
- Nothing has been manually changed in Marketo that conflicts with your campaign
- Performance data is collected (if configured in your template)
Common Workflows
Adding Assets Mid-Campaign
Need to add a regional variant or follow-up email after your campaign is already set up?- Mary can create new assets from your existing campaign
- Content automatically inherits from the parent campaign by default
- Regional overrides (e.g., APAC-specific hero copy) only affect the new asset
- Only the new asset goes through build and deploy—existing assets aren’t touched
Fixing Validation Errors
If an asset gets stuck in Error status:- Check the activity log for the specific error message
- Common issues: missing Marketo program ID, non-HTTPS image URL, or unapproved CTA domain
- Update the content through the chat interface
- Mary automatically re-runs validation once you fix the issue
Best Practices
Structure your briefs with clear headings
Structure your briefs with clear headings
Use H1 and H2 headings to organize your brief. Mary uses these to understand your campaign structure, so “Email 1 Content” as an H1 makes it crystal clear what goes where.
Double-check required info before uploading
Double-check required info before uploading
Make sure all required content is in your brief (program IDs, event dates, etc.). It’s much faster to add these in the document than to go back and forth in chat later.
Be specific when requesting changes
Be specific when requesting changes
Instead of “change the hero image,” say “change the email 1 hero_banner to [URL]” (could be multiple hero images in the campaign). Mary can figure out ambiguous requests, but being specific saves time.
Use the activity log for troubleshooting
Use the activity log for troubleshooting
The activity log is your complete audit trail. If something fails, the log shows exactly what went wrong and which content field caused the issue.
Set campaign-wide defaults
Set campaign-wide defaults
Put shared content at the campaign level (brand colors, legal disclaimers, UTM parameters). Regional or asset-specific versions can override these as needed.
Troubleshooting
Asset stuck in Draft
Asset stuck in Draft
Check the activity log for validation errors. Common causes: missing program ID, non-HTTPS image, or required content field not filled in your brief.
Mary can't find a content field
Mary can't find a content field
Use the content highlighter to verify the field exists. If it’s not there, it wasn’t extracted from your brief. You can add it manually through chat.
Deploy failed with 'Program not found'
Deploy failed with 'Program not found'
The program ID points to a Marketo program that doesn’t exist or you don’t have permission to access. Verify the ID in Marketo and update your campaign.
Multiple people editing the same asset
Multiple people editing the same asset
Mary handles this automatically. All requests are queued and processed in order. The task list shows who requested what and when.
Manual Marketo edits not showing up
Manual Marketo edits not showing up
Mary doesn’t automatically detect changes made directly in Marketo. Use “Force Re-check” to sync your campaign state with what’s actually live.