

Before you begin
You’ll need:- Claude Desktop installed (macOS or Windows)
- A Claude plan that supports custom connectors (Pro, Max, Team, or Enterprise)
- An allGood account with access to the Marketo integration
- The allGood Marketo MCP server URL:
https://api.allgoodhq.app/mcp/marketo
Custom connectors aren’t available on Claude’s Free plan, and may need to be enabled by a workspace admin on Team or Enterprise plans. If you’re the admin, start with Roll out the Marketo MCP to your organization. See Anthropic’s Get started with custom connectors using remote MCP if you run into an issue that isn’t covered here.
Steps
1
Open connector settings
- Open Claude Desktop
- Click your profile icon in the bottom-left corner and select Settings
- Go to the Connectors tab
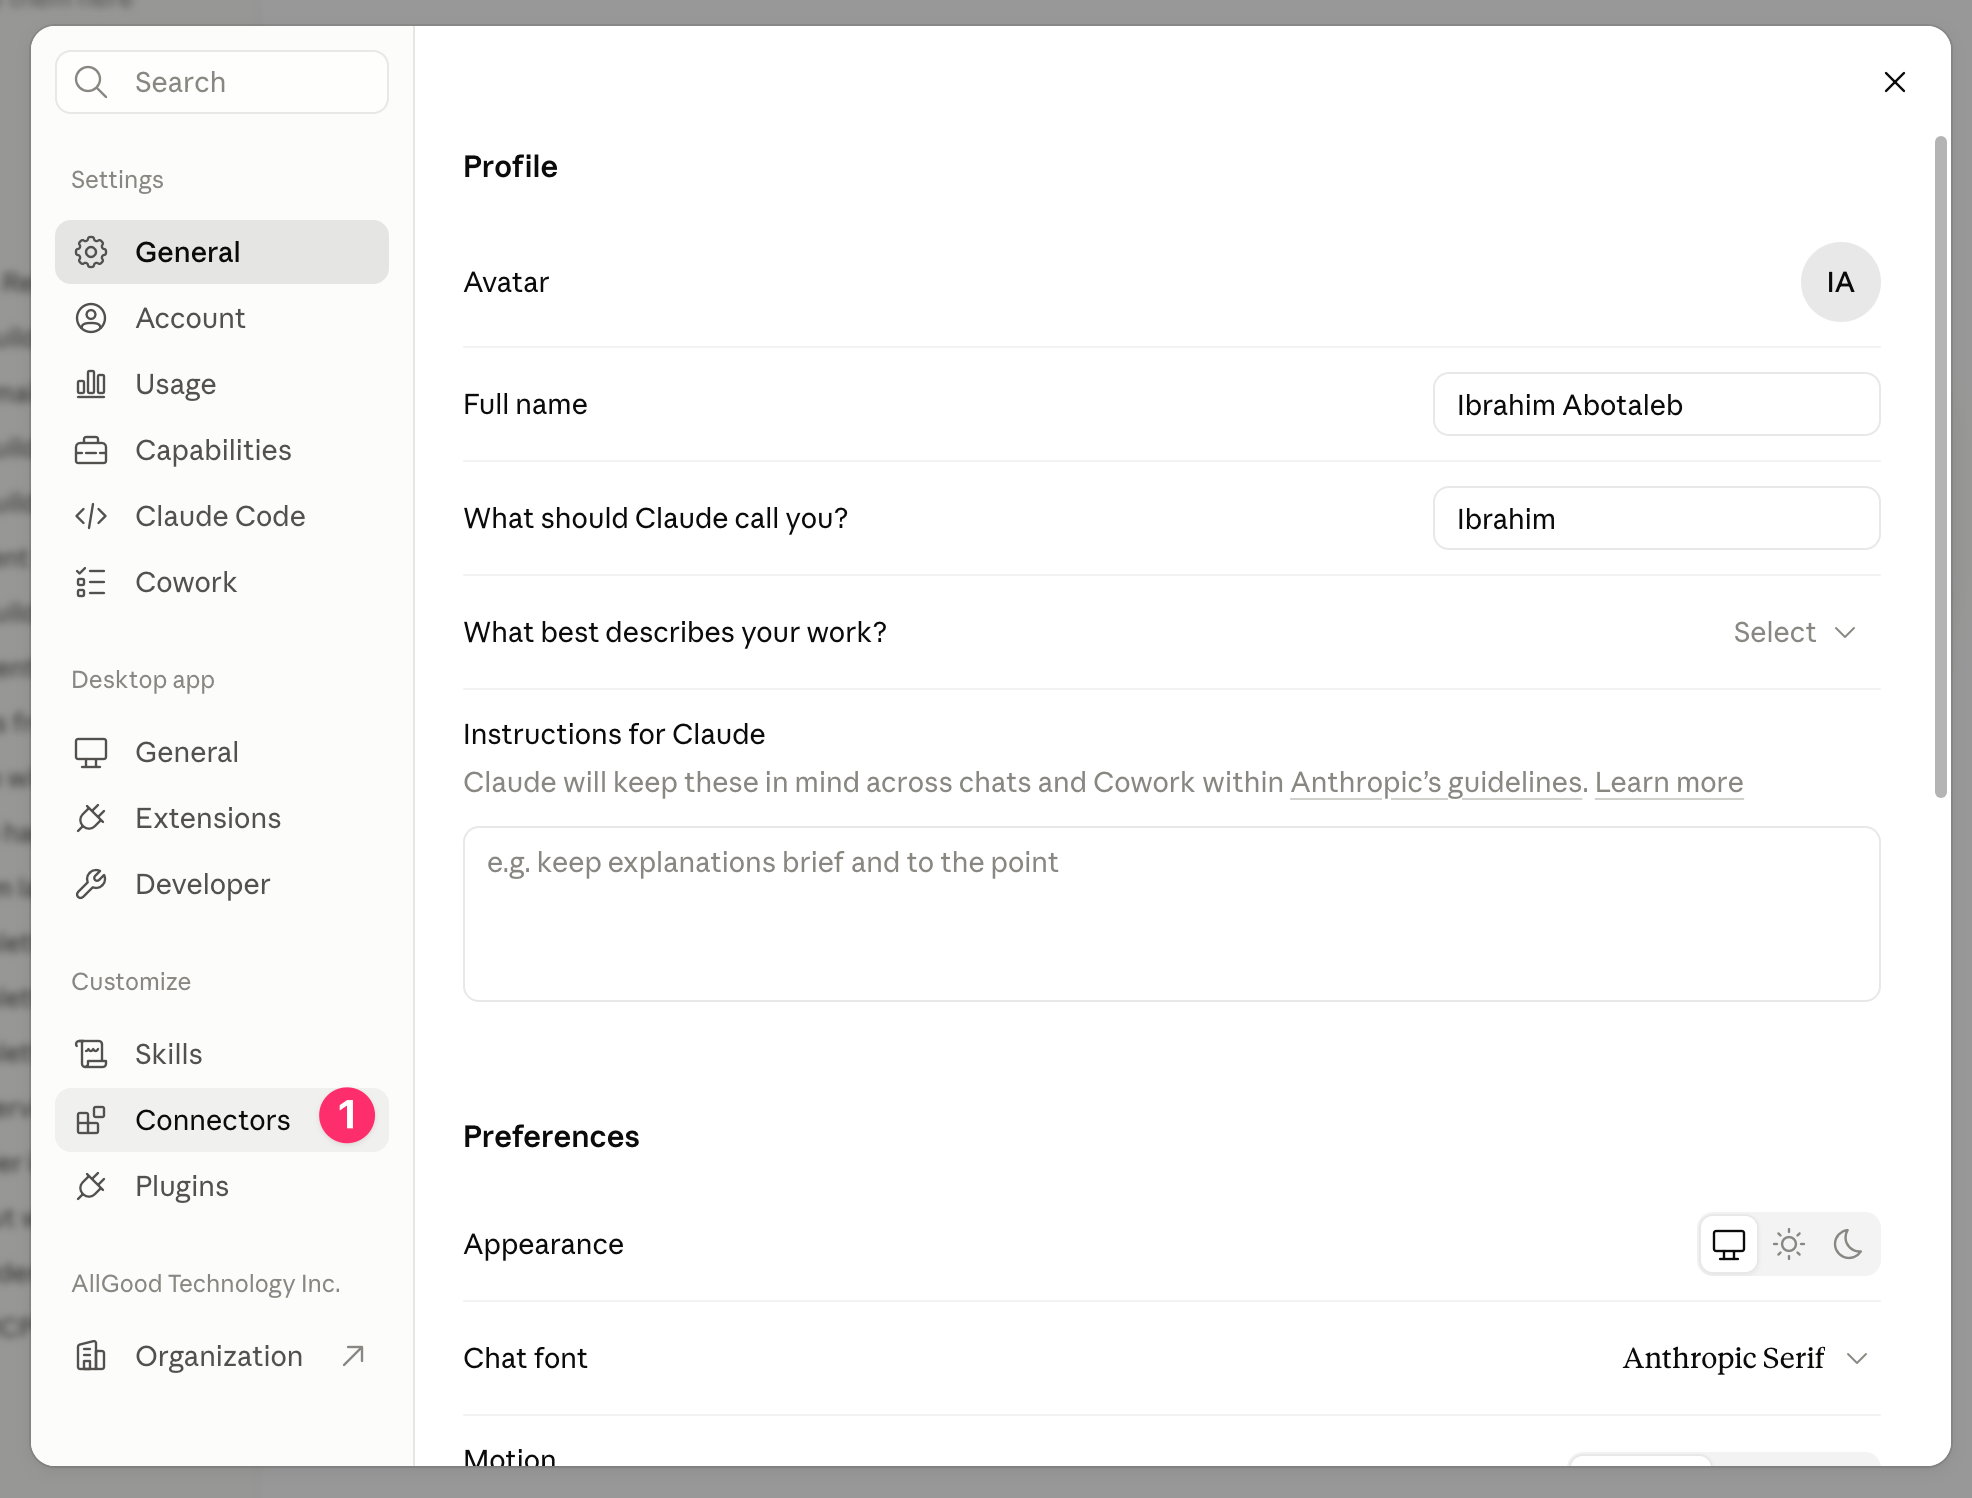
Claude Desktop Settings window with the Connectors tab selected
2
Add a custom connector
- Scroll to the top of the Connectors list and click Add > Add custom connector
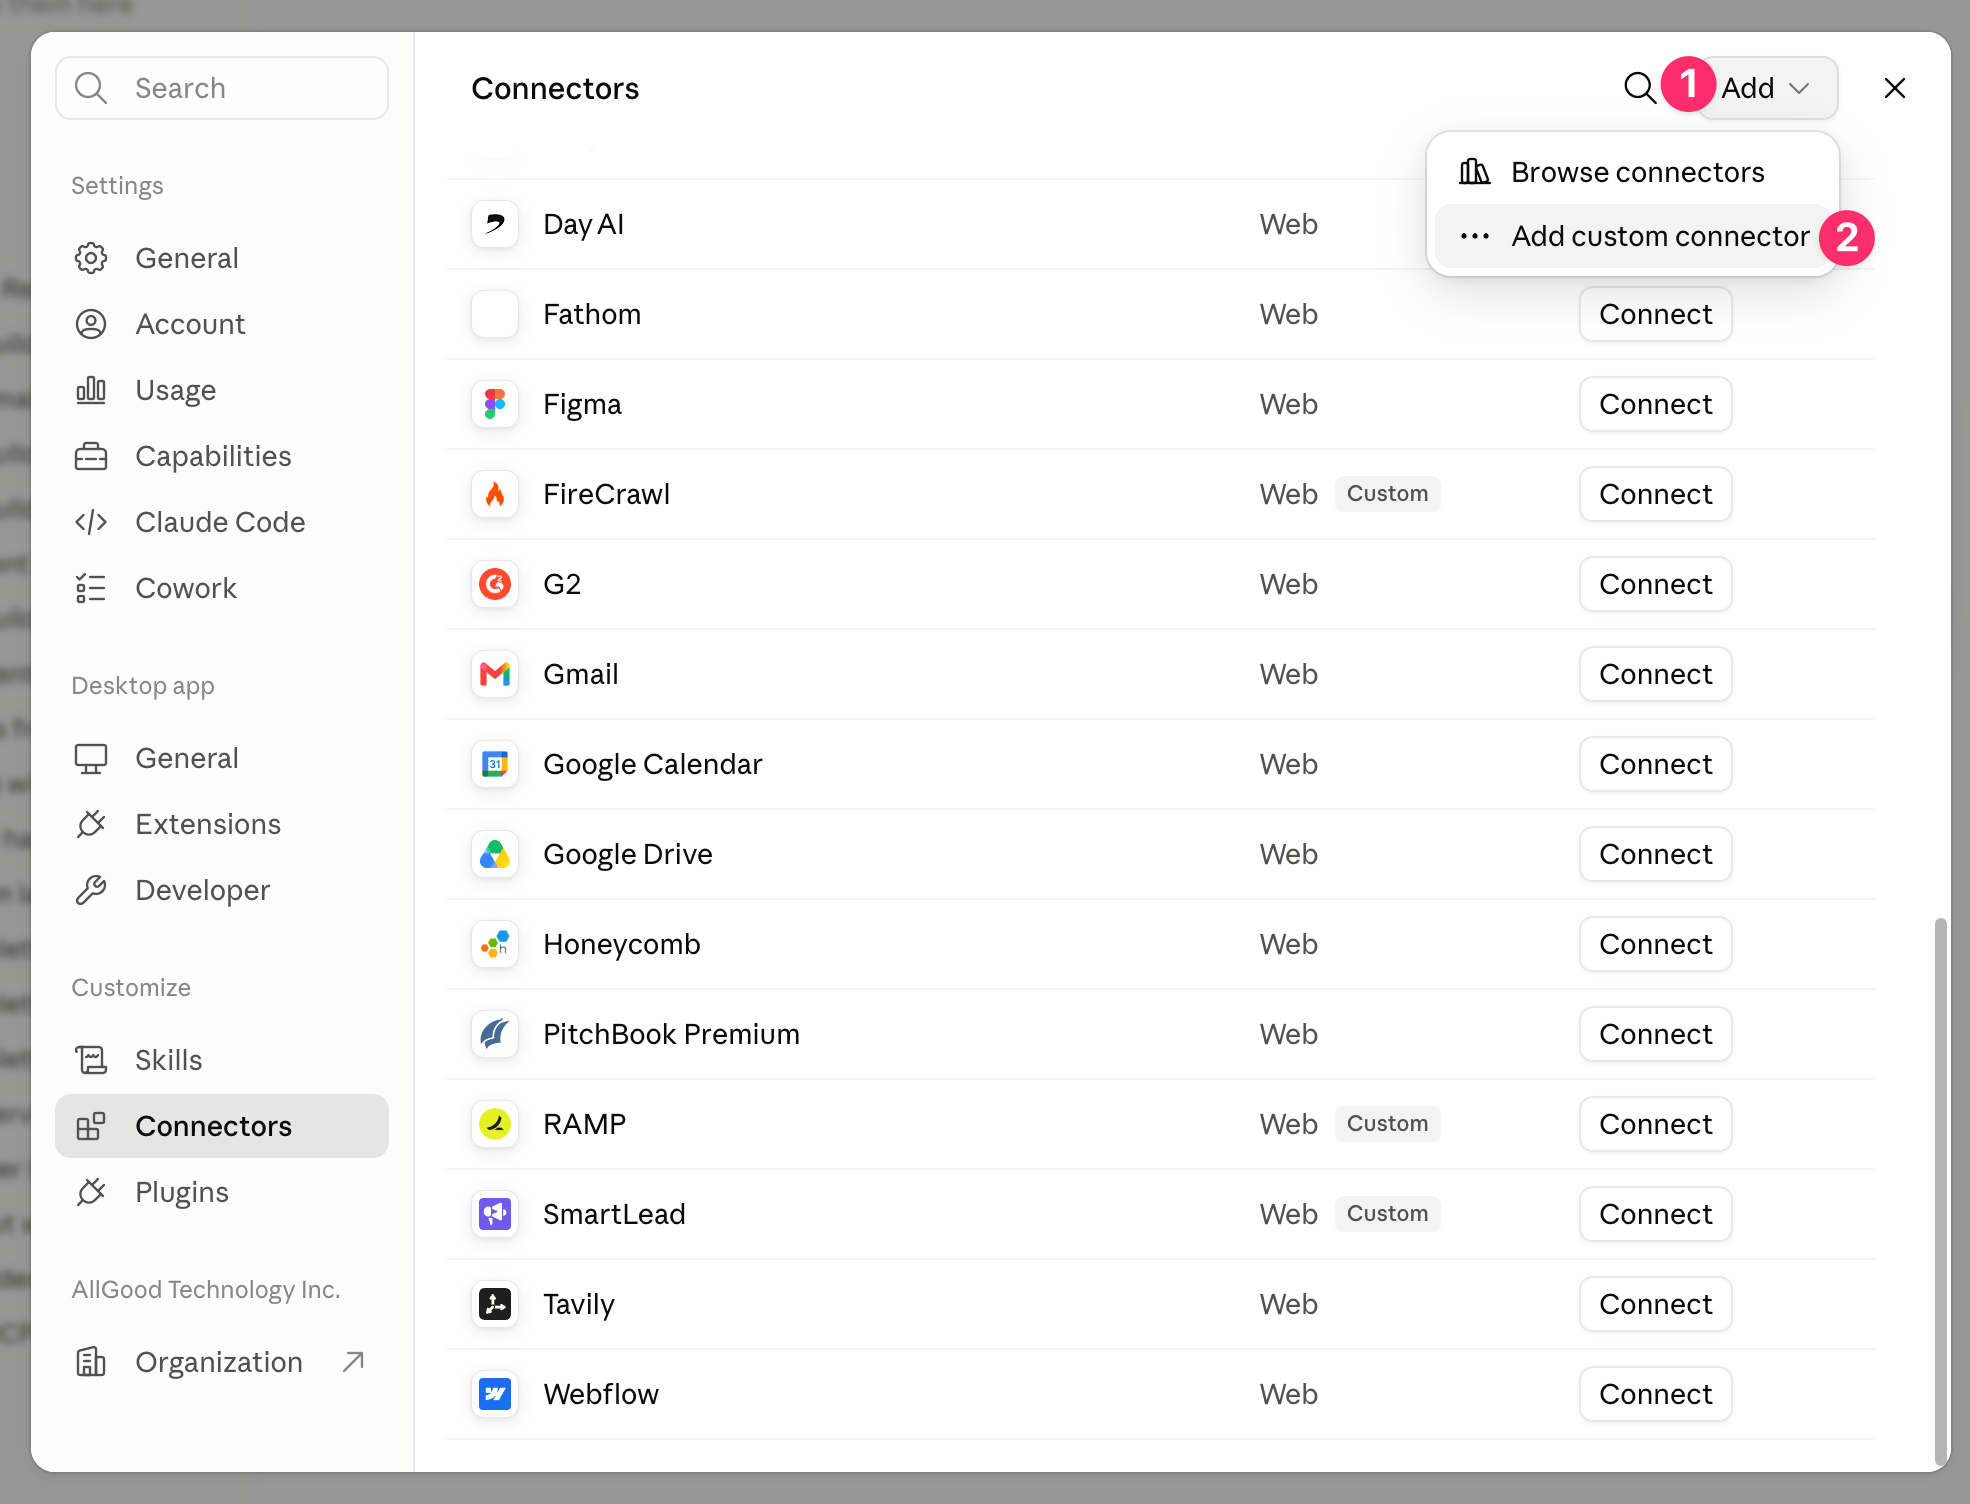
Connectors tab showing the Add menu with Add custom connector selected
3
Enter the connector details
- In Name, enter
allGood Marketo - In URL, enter
https://api.allgoodhq.app/mcp/marketo - Click Add
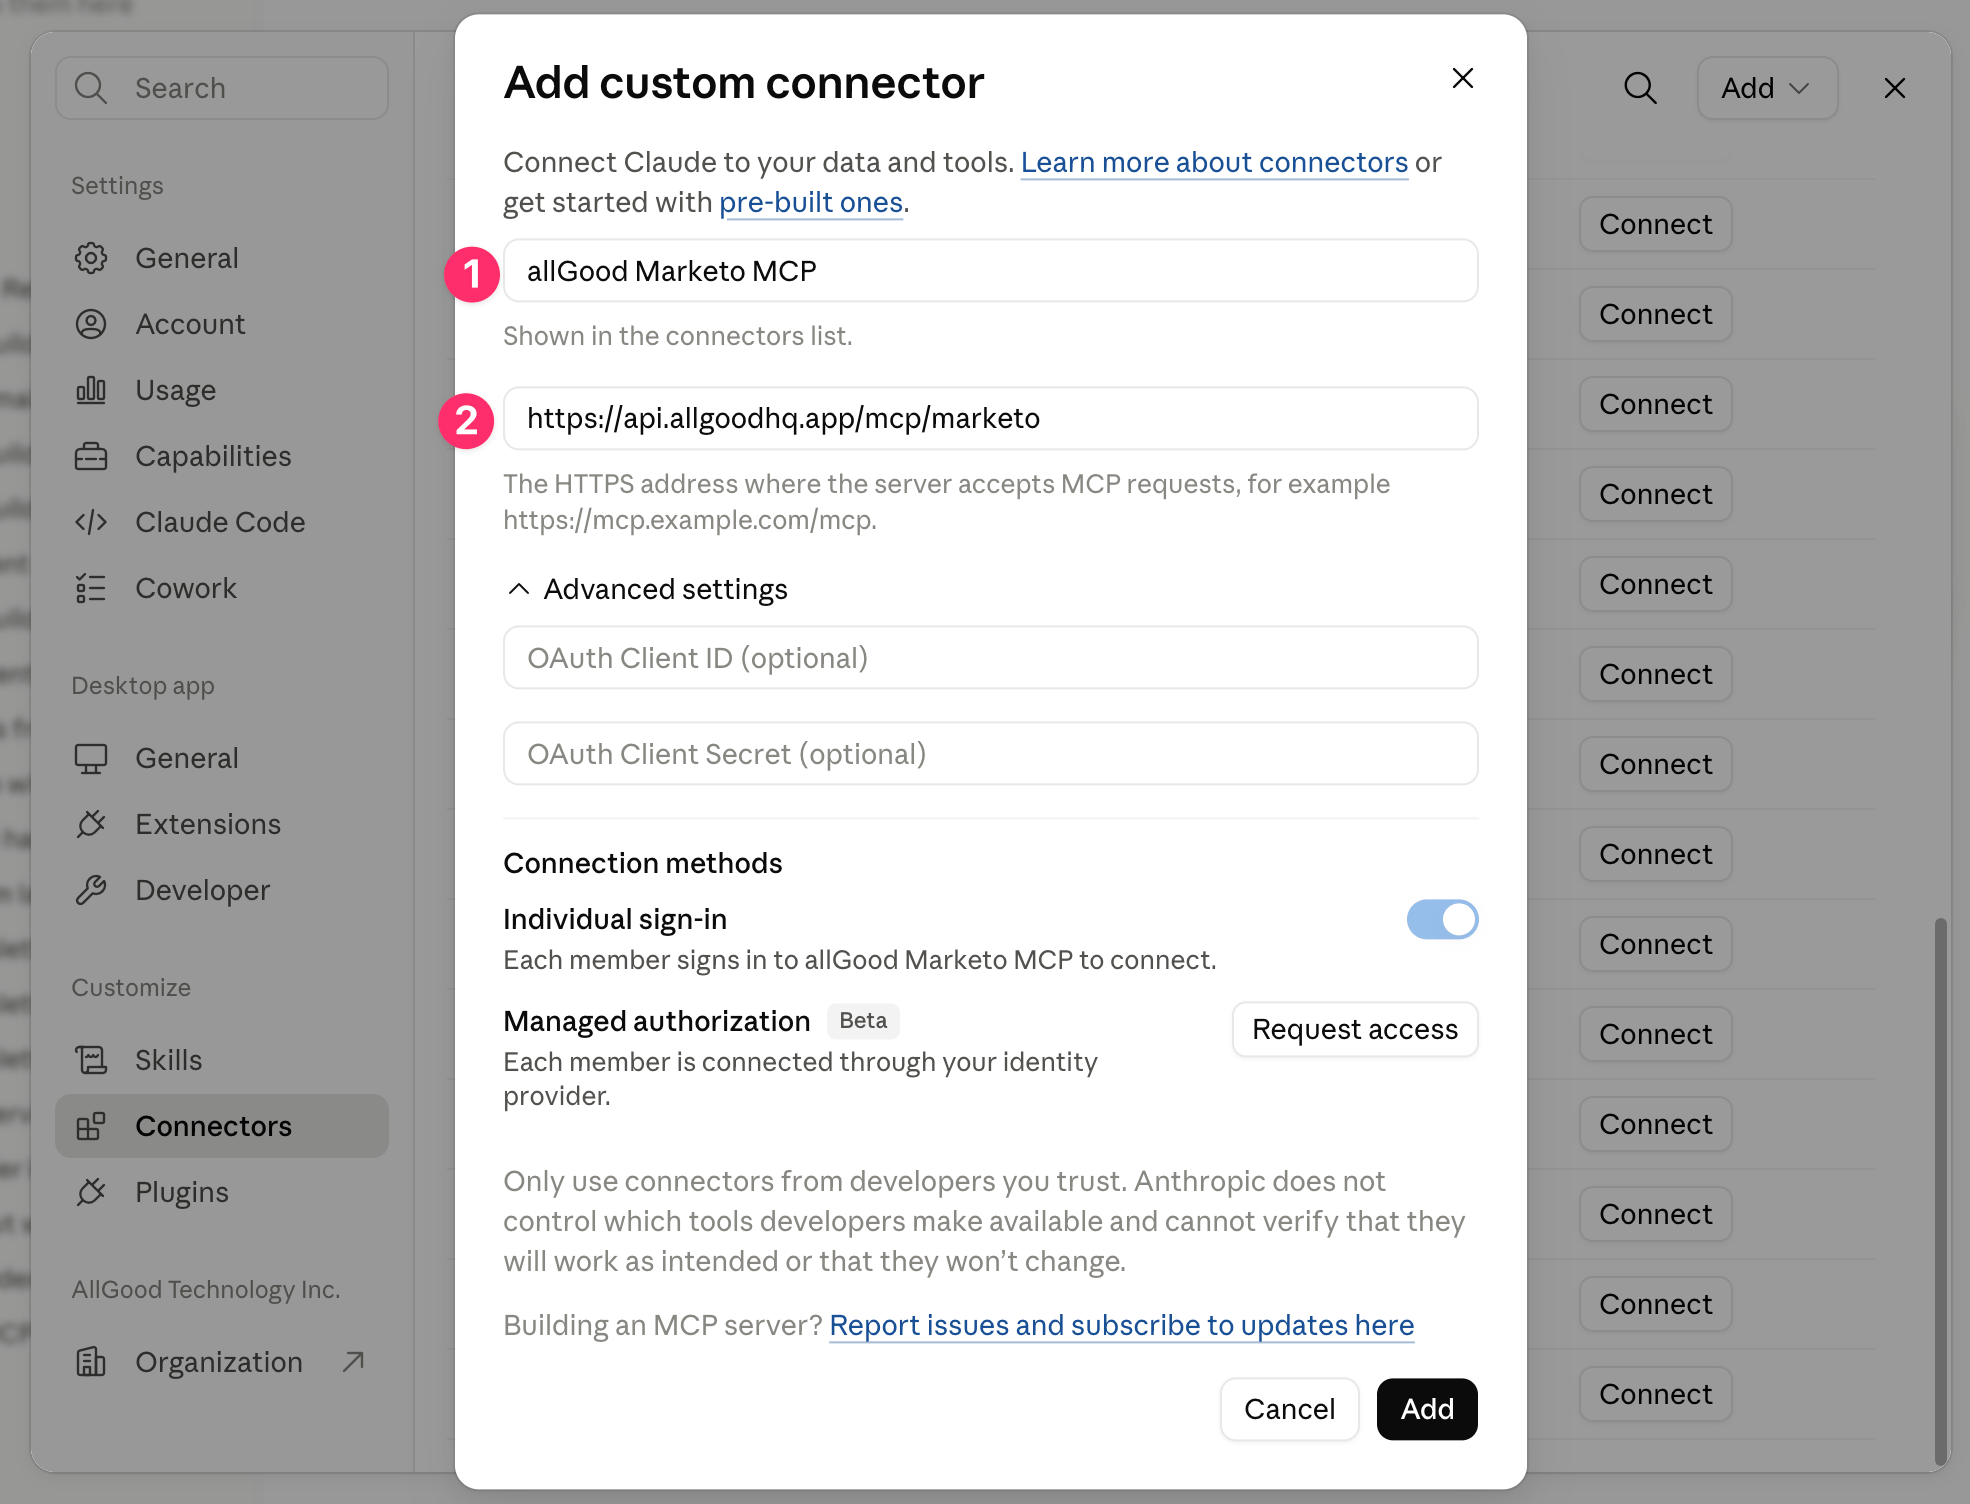
Add custom connector dialog with name and URL fields filled in
4
Connect the connector
- Find allGood Marketo in your Connectors list and click Connect
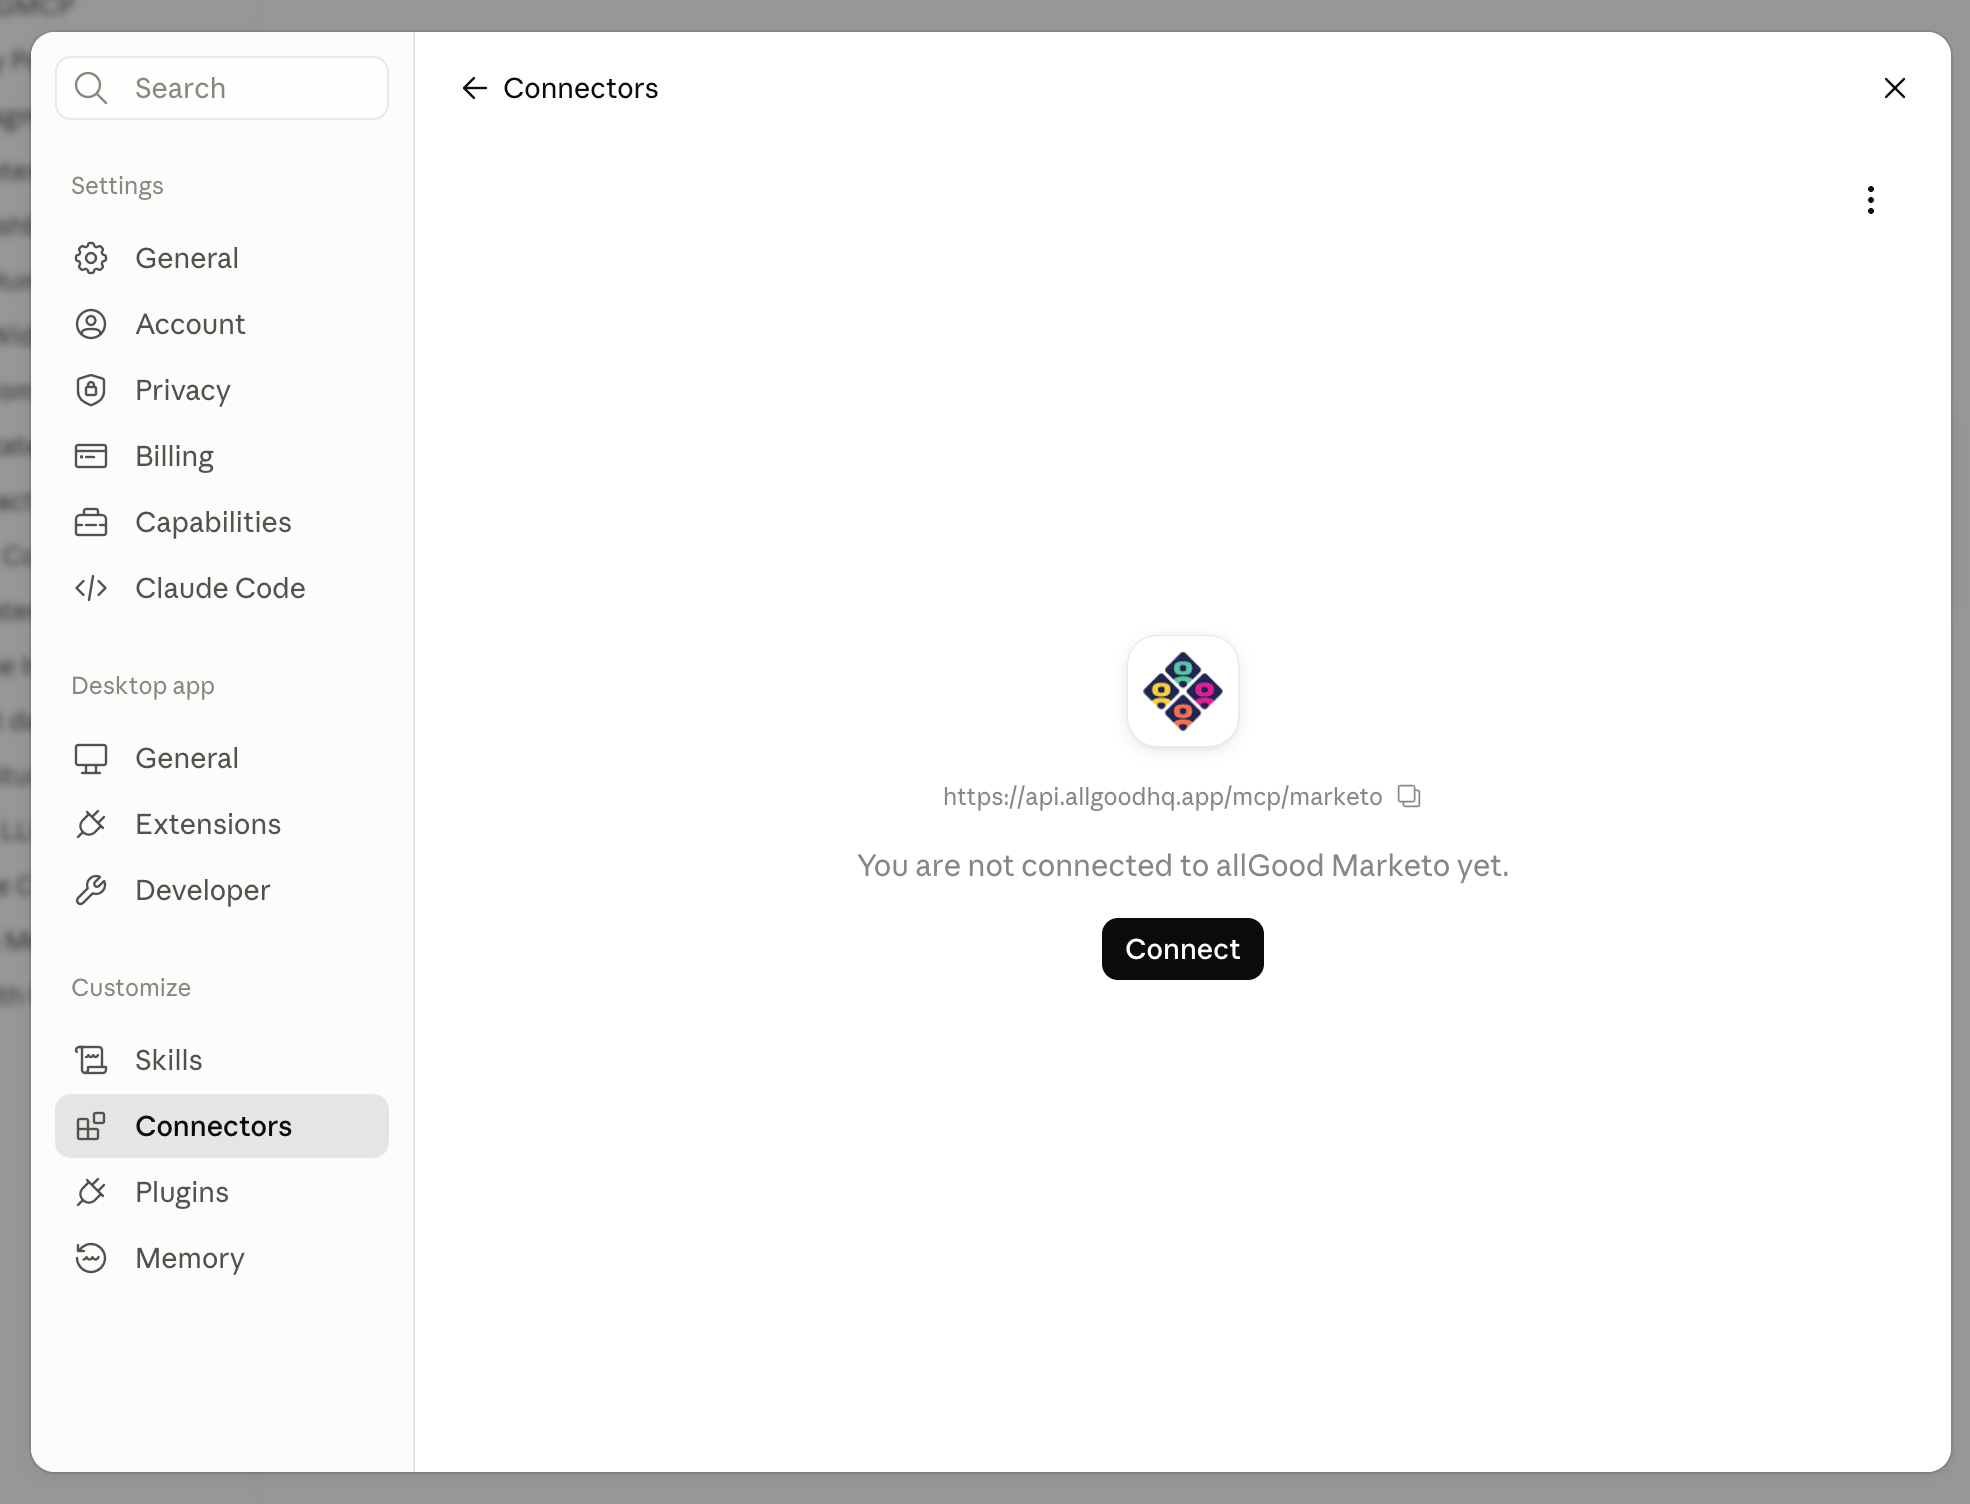
allGood Marketo connector page with a Connect button
5
Authorize access
- In the browser window that opens, log into your allGood account
- Review the requested permissions and click Allow
- When the browser window closes, check that the connector status is Connected
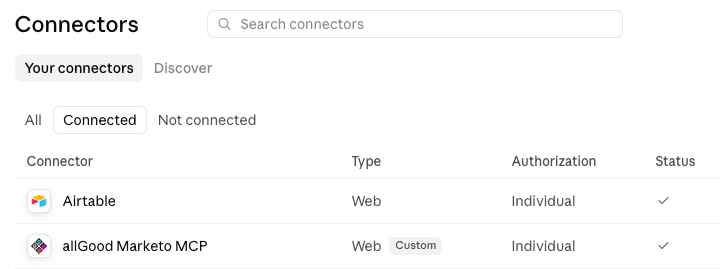
Connectors list showing allGood Marketo with a Connected status
6
Enable the connector in a chat
- Start a new chat in Claude Desktop
- Click the tools icon below the message box
- Confirm allGood Marketo is toggled on for this conversation
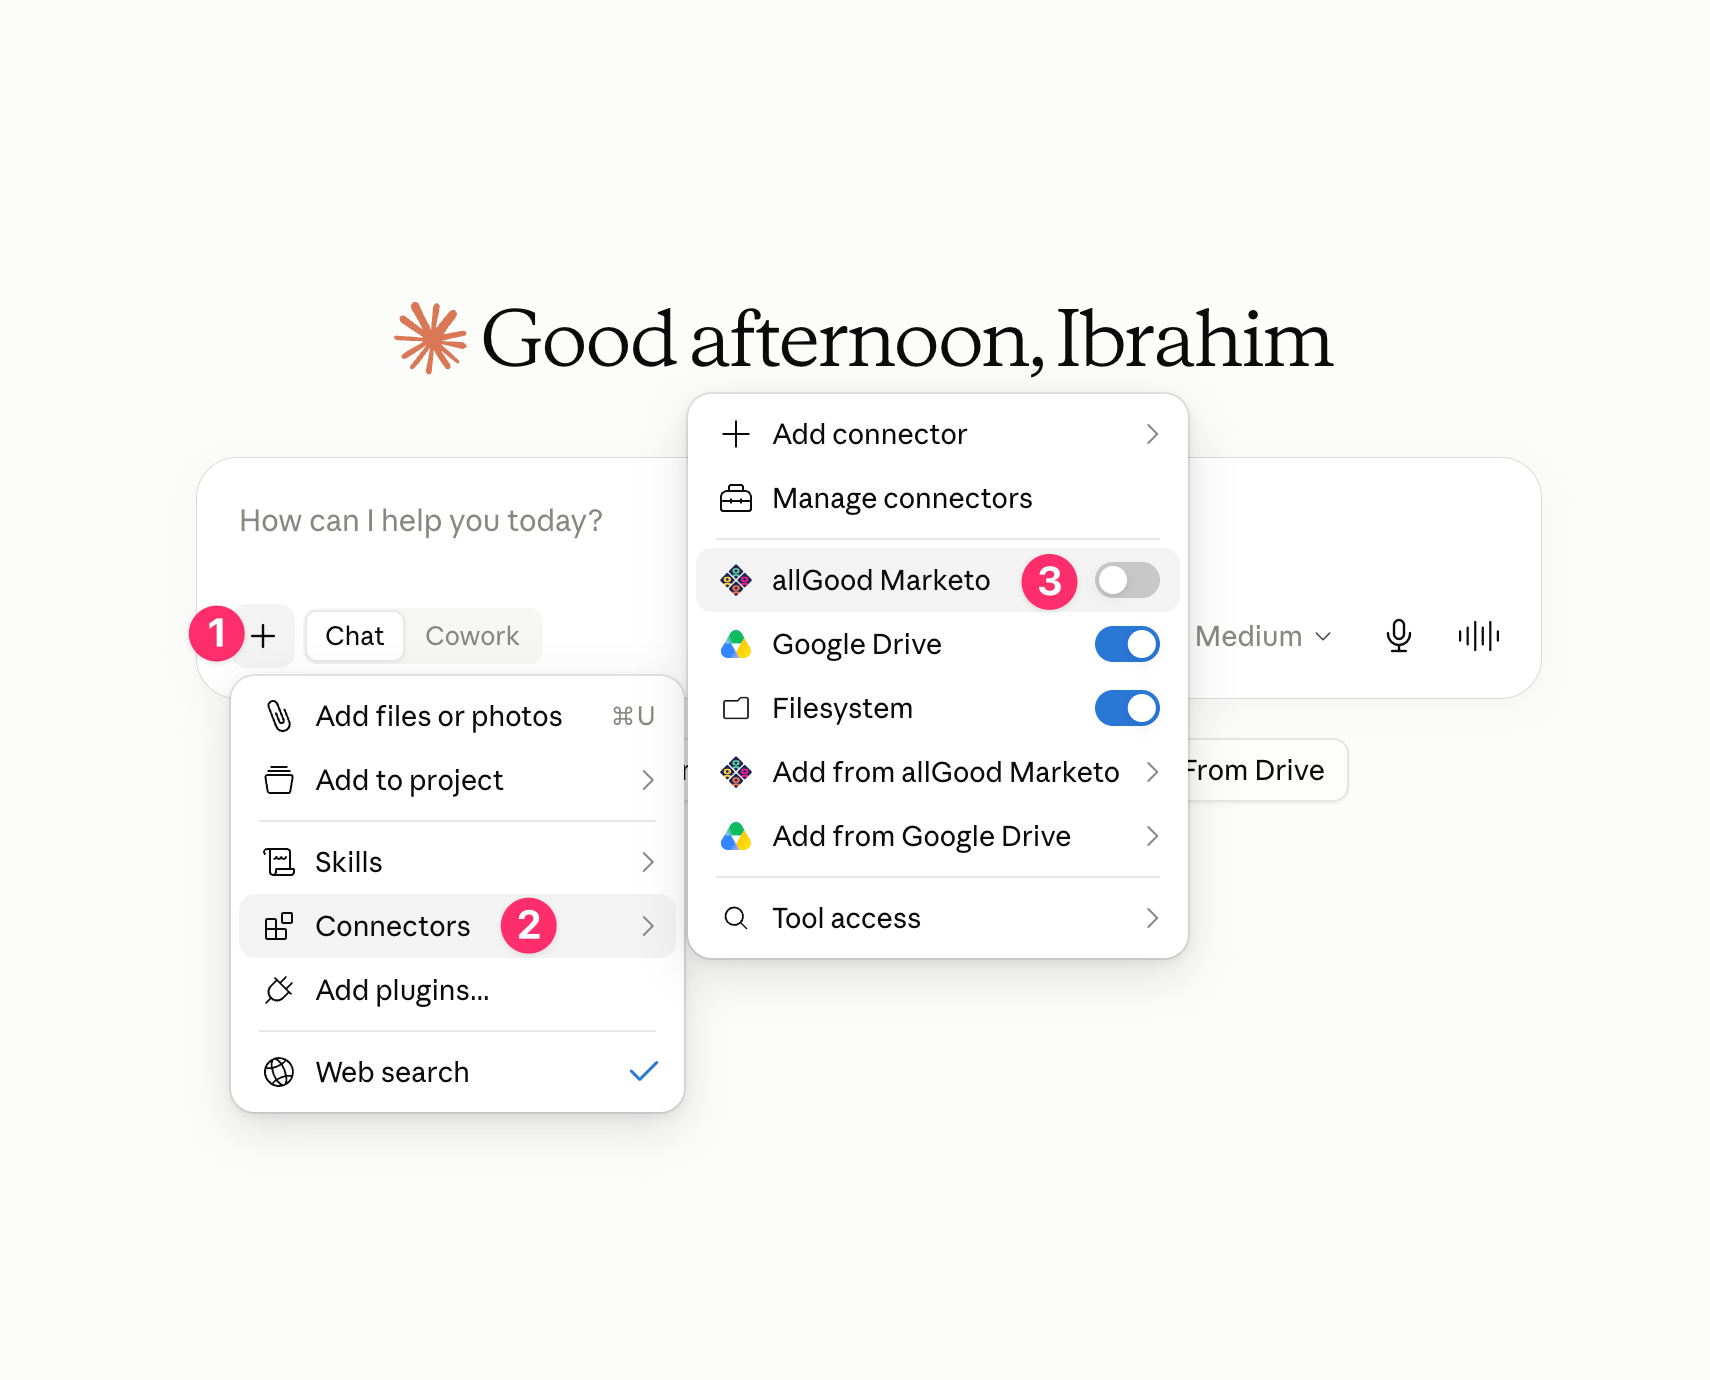
Chat tools menu showing the allGood Marketo connector toggled on
7
Test the connection
Ask Claude something like:
“Using allGood Marketo, look up the program details for [program name].”
Optional: Allow allGood’s API domain for image uploads
This step is only needed if you want to use the Marketo MCP’s image upload capability (uploading assets to Design Studio). Everything else — looking up programs, emails, forms, and templates, cloning campaigns — works without it.
api.allgoodhq.app on the allowed list.
Only Team and Enterprise Owners can add domains, so ask your admin. Admins can find the steps in Roll out the Marketo MCP to your organization. Pro and Max plans can’t add custom domains.
Troubleshooting
The connector shows Disconnected
The connector shows Disconnected
Click Connect again and re-authenticate — your allGood session may have expired.
Claude says it doesn't have access to Marketo tools
Claude says it doesn't have access to Marketo tools
Make sure the connector is toggled on for the current chat (see Enable the connector in a chat). It’s enabled per conversation, not globally.
Add custom connector is missing from Settings
Add custom connector is missing from Settings
Custom connectors require a Claude plan that supports them (Pro, Max, Team, or Enterprise) and may need to be enabled by your workspace admin. Admins can find the steps in Roll out the Marketo MCP to your organization.
Image uploads to Design Studio fail
Image uploads to Design Studio fail
Confirm
api.allgoodhq.app is on your organization’s allowed domains. Only Team and Enterprise Owners can add domains, so ask your admin. Claude blocks image uploads until the domain is added. This doesn’t affect any other Marketo MCP functionality.